Quick Tip: How to block websites using Hosts file in Windows
Now you can suspend/block specific websites on your computer on Windows running OS. Why would you want to block websites because sometimes we get addicted to a few sites and spend hours without realizing the fact that our time is being wasted? What a shame and we keep on wasting more and more time daily but we don’t bother to block those websites which waste our time. This is not a tutorial but more like a quick tip to block websites with Hosts file in Windows.
I prefer to block websites that waste our precious time and don’t let us do what’s worth our time. So, I thought if I could give you a pretty good way to block websites using Hosts files in Windows operating system.
Block websites using Hosts file in Windows
A hosts file is one of the most important files in Windows System32 folder that help us to manage hostnames to IP addresses. It is a plain text file. Originally a file named HOSTS.TXT. I’m going to guide you to block websites using Hosts file in Windows so that you can simply block the time-consuming sites.
Follow the steps to block your desired site in Hosts file:
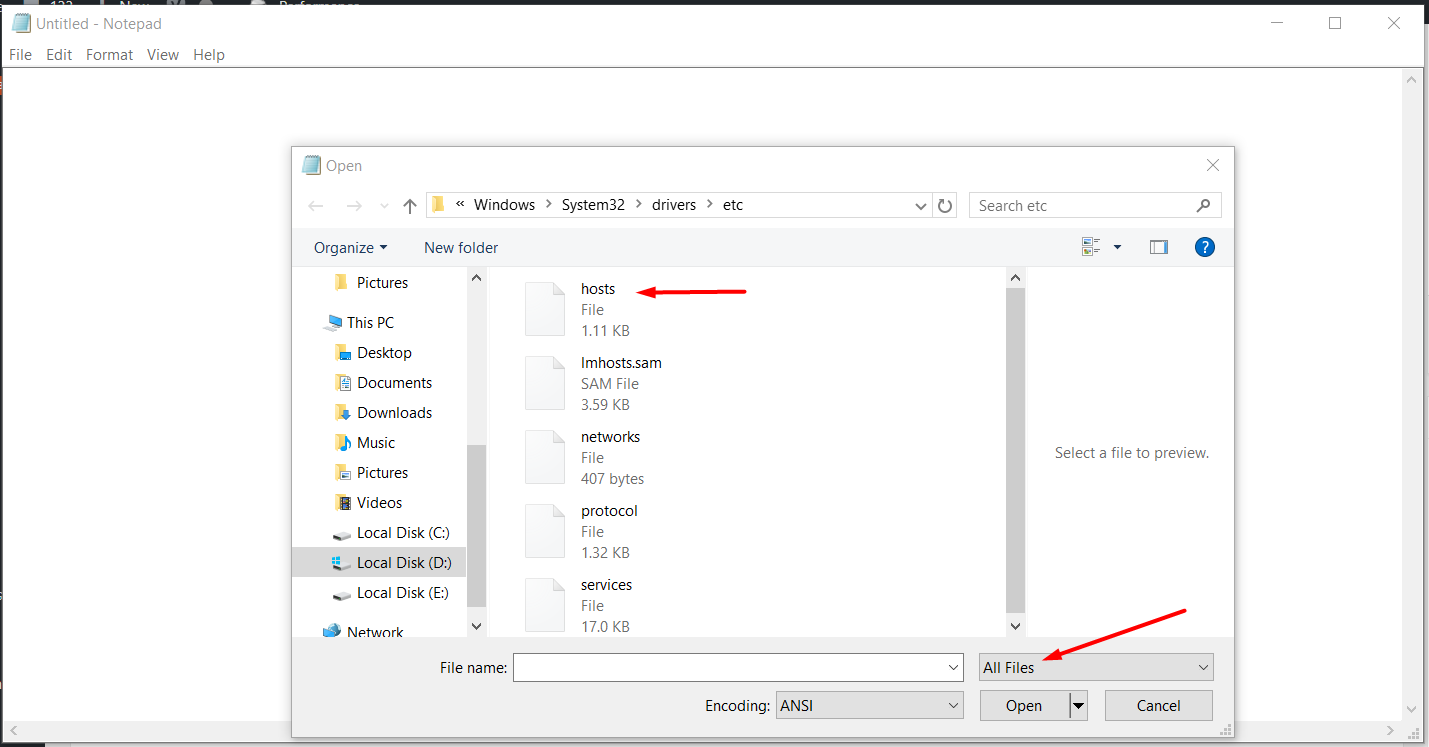
- Go to Windows → System32 → Drivers → etc →hosts
- Once you are there, open Notepad but Run as administrator

- Now, open the file in notepad by going to the directory mentioned in the very first step.
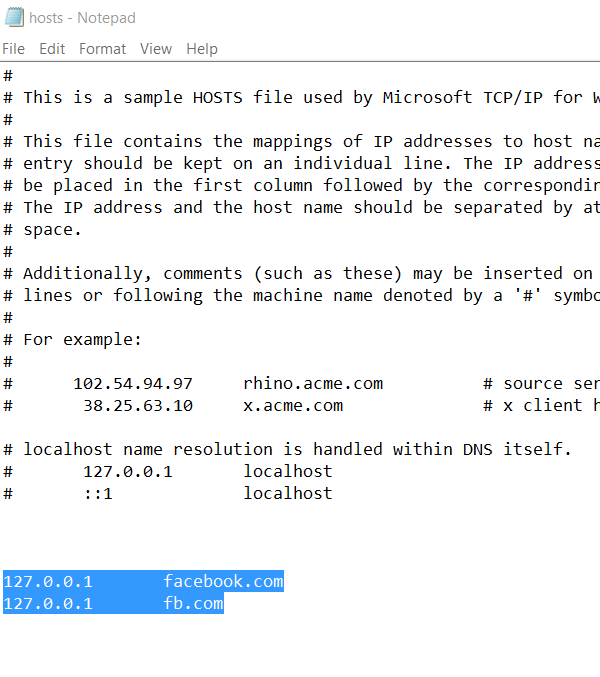
- Open the hosts file and paste the following code right after localhost lines:
127.0.0.1 facebook.com
127.0.0.1 fb.com
- Make sure you don’t add # in the starting of the IP address because that’ll count as comment
- Just do what I did. The screenshot is attached below.
Troubleshooting opening Hosts file in Windows
Note: That the host file is hidden by default and to get access to hosts file you must go to folder options and put a check in “show hidden files and folders” now when you attempt to modify the file (make sure the read-only attribute is unchecked) windows WRP will kick in with UAC.
Now:
- Go to start, all programs, accessories and right-click on Notepad select “properties“
- Under properties select “advanced“
- Put a check in “run as administrator“
- Try your modifications now