How to unlock bootloader on Google Nexus 9
Recently, I was publishing articles on rooting and unlocking bootloaders on Samsung galaxy devices. Recently, Google Nexus 9 is released with HTC. If you have got Google Nexus 9 and want to unlock bootloader on it then you should read the rest of the article. In this article, you will learn to unlock bootloader on Google Nexus 9 using built-in OEM unlock feature in developer options and via fastboot Windows too. It is totally up to you which method you would prefer to unlock bootloader on your HTC Google Nexus 9.
[loop type=glossary name=bootloader count=1]
[field title]
[content]
[/loop]
How to unlock bootloader on Google Nexus 9
Method #1: unlock bootloader on Google Nexus 9 (OEM Unlock)
Follow the steps to unlock bootloader on Google Nexus 9 using OEM unlock feature:
- Go to Settings → Tap on Build number 7-8 times
- This will make developers options available inside Settings
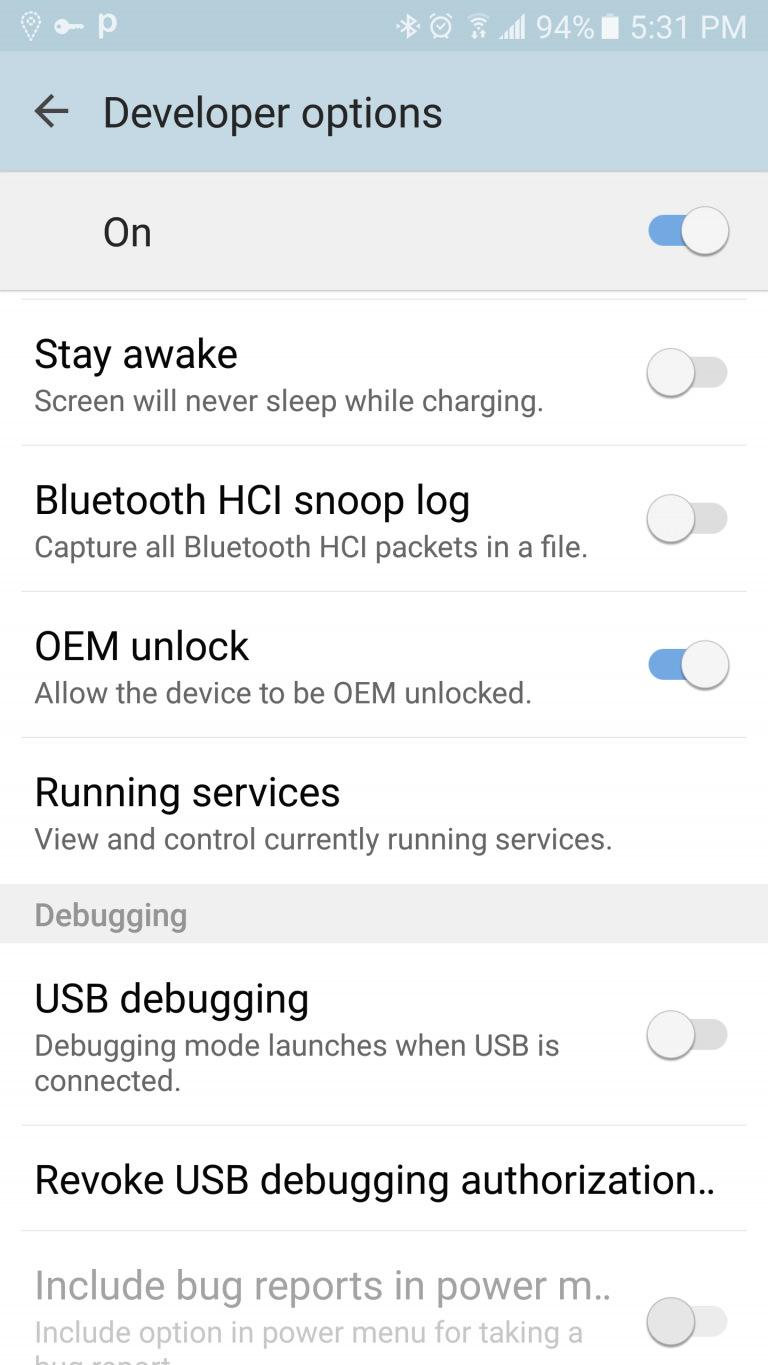
- Now, if you have OEM unlock toggle available in your developers options
- You can one-tab unlock bootloader (OEM unlock) on your Google Nexus 9
- Tapping over blue toggle sign will unlock bootloader of your Google Nexus 9
This is the easiest way to unlock bootloader on Android smartphones so far and many Samsung Galaxy devices do have this feature.
Another method is a bit lengthy and tricky which requires USB drivers to be install and it actually requires PC. Make sure you must have pre-requisites ready before you start following the second method.
Pre-requisites:
- Make sure your phone is 80% charged (If you phone goes dead in the middle of the process, you might end up bricking up your device)
- Take necessary Android backup
- USB cord
- USB drivers installed on your computer
How to unlock Bootloader on Google Nexus 9
Follow the steps to unlock bootloader on Google Nexus 9:
- Enable USB Debugging under developer options
[loop type=glossary name=enable-usb-debugging count=1]
How to [field title] on Google Nexus 9
[content]
[/loop]
- Download ADB / Fastboot (this can also be done with Download Android SDK) and install on your computer.
- Connect your Google Nexus 9 to your PC via USB cord
- Run fastboot-windows.exe inside it
- Now, select open command window here (Ctrl + R)
- For Windows: In the directory, open Command Prompt (Shift + Right-click > Open Command Prompt)
- For Mac and Linux: Use Terminal to navigate to the ADB / Fastboot directory
- In the command prompt, type the following and hit enter:
adb-windows reboot bootloader(and wait for the device to reboot)After the device is rebooted run this command that will unlock oem unlock (unlock bootloader in Google Nexus 9):fastboot-windows oem unlock
Congrats, you have successfully unlocked bootloader on Google Nexus 9.
NOTE: You should understand one thing that your smartphone warranty will be void on unlocking bootloader on your Google Nexus 9. Read the disclaimer and don’t skip steps.

