How to Create a Coupon Website Using WordPress
Clipper is a great WordPress theme to make a coupon website. It has numerous useful features, making it loved by thousands across the industry. In this tutorial, we are going to learn how to setup a coupon website using WordPress. Let’s begin!
First of all, you must have a site hosted on WordPress. If you already don’t, install WordPress on your domain name(e.g. example.com).
Done? Now, its time to purchase Clipper theme. Clipper is a premium theme, meaning you must purchase its license in order to use it. I know there are free Clipper themes available on the internet, but wait! They are piece of shit! And did I mention they USUALLY contain malicious codes to help in hacking your website?
Back to the topic.. did you make the purchase?
Install it on your WordPress-hosted site either through admin dashboard or by uploading it to your server via FTP. This official article explains it all.
Configuring Clipper
Once you have your Clipper theme installed and activated, it’s time to configure it to get most out of it and to set it up in a way you like. At this point, your site should be working fine and have Amazon coupon by default. There’s this “Share a Coupon” button to add more coupons to site. Add as much categories to your site as possible to visitors can submit coupons to appropriate category.
Done? Now, go Dashboard > Clipper > Settings, here you will find various settings for your coupon site. Selecting of color scheme, enabling logo, specifying a favicon for the website, setting feedburner URL, twitter URL, Facebook URL, adding tracking code can be done here and options like ‘Moderate New Coupons‘ are here too.
Make sure to check ‘Moderate New Coupons‘ and ‘Require Registration to Post Coupons‘. This will be very useful in reducing the number of spammers registering on your site and ensuring all coupons on your site are valid and offer great value to users. Moderating takes minutes, but ensures a ton of value. Sand the likes can be done from here. Clipper creates custom taxonomies for coupon categories, stores, tags and coupon types. Set it up the way you like. It is so easy to configure that it is not worth explanation, in my opinion.
Add a ‘Share a Coupon’ Button
For Sidebar: Clipper theme provides many widgets that significantly change the look and functionality of your coupon website. ‘Share a Coupon’ is a button helping users submit discount coupons they know of. In previous version of Clipper, it used to be hard to add it. But now there’s a widget. Here’s how to add it:
Go to Dashboard > Appearance > Widgets, drag a widget called “Clipper Share Coupon Button” and drop it in your sidebar.
Tip: For more click-through-rates, push it to the top of sidebar.
Add a “Title” and “Description“, the former will be the larger text on button and latter will be smaller. Hit “Save“. Now you should see a “Share a Coupon” or whatever your widget title is in the sidebar.
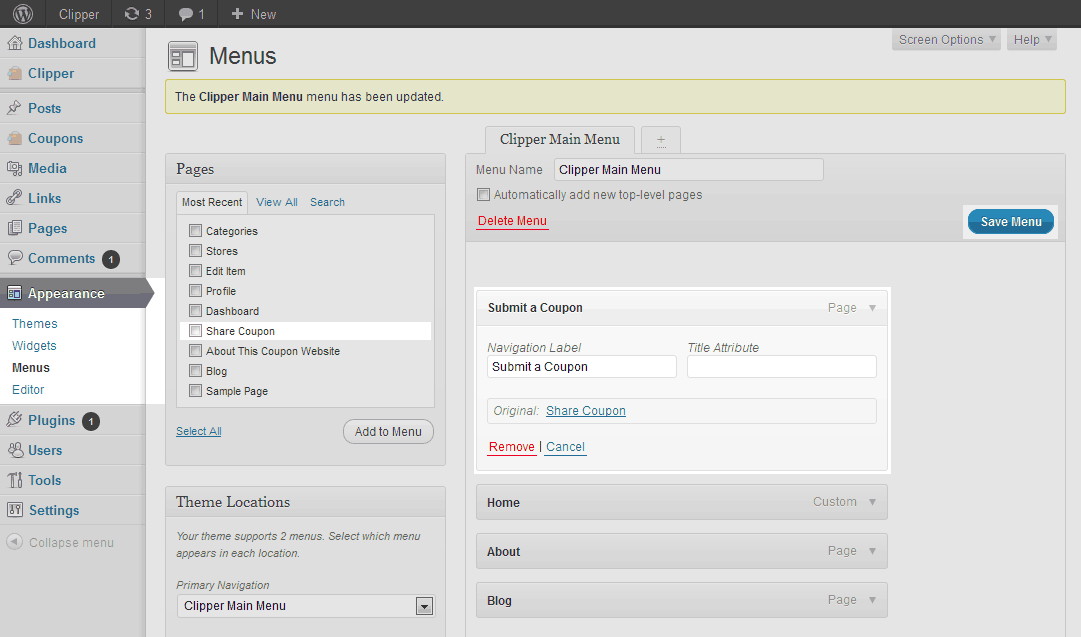
For Primary Navigation: This was how to add ‘submit coupon’ to sidebar, now lets learn how to add it to the primary navigation.

Go to Dashboard > Appearance > Menus, ensure “Clipper Main Menu” tab is chosen. Tick “Share Coupon” in the Pages panel and click “Save“. Done.
Setting Up Stores
Go to Dashboard > Coupons tab > Stores. You can create a new store from here, just fill the form.
Congratulations! Your coupon website is ready to go!
One last thing – Share this tutorial with at least one person!
You would surmise that when you make a coupon site and web journal, the website would discuss the coupons. That is not the situation. You will increase better social remaining with your guests in the event that you discuss the lifestyle that the items you are putting forth coupons for speaks to. By giving them a chance to inventively envision carrying on with a certain life, your site gets connected with its existence and the items recorded get to be more alluring.