How to Bypass TPM 2.0 requirement for running Windows 11
There are issues with some people who want to install Windows 11. Some reported that, the Windows 11 bootable drive is giving error:
This PC doesn’t meet the minimum system requirements to install this version of Windows.
If you are facing above error when you are trying to upgrade from Windows 10 to Windows 11, I personally recommend you read the rest of the article. I’m sure that you can fix the system requirement issue.
Bypass: Minimum system requirements to install this version of Windows
First and foremost, you make sure that you have a Windows 11 bootable USB drive. Secondly, before installing Windows 11, make sure to follow the steps below:
Steps before installing Windows 11:
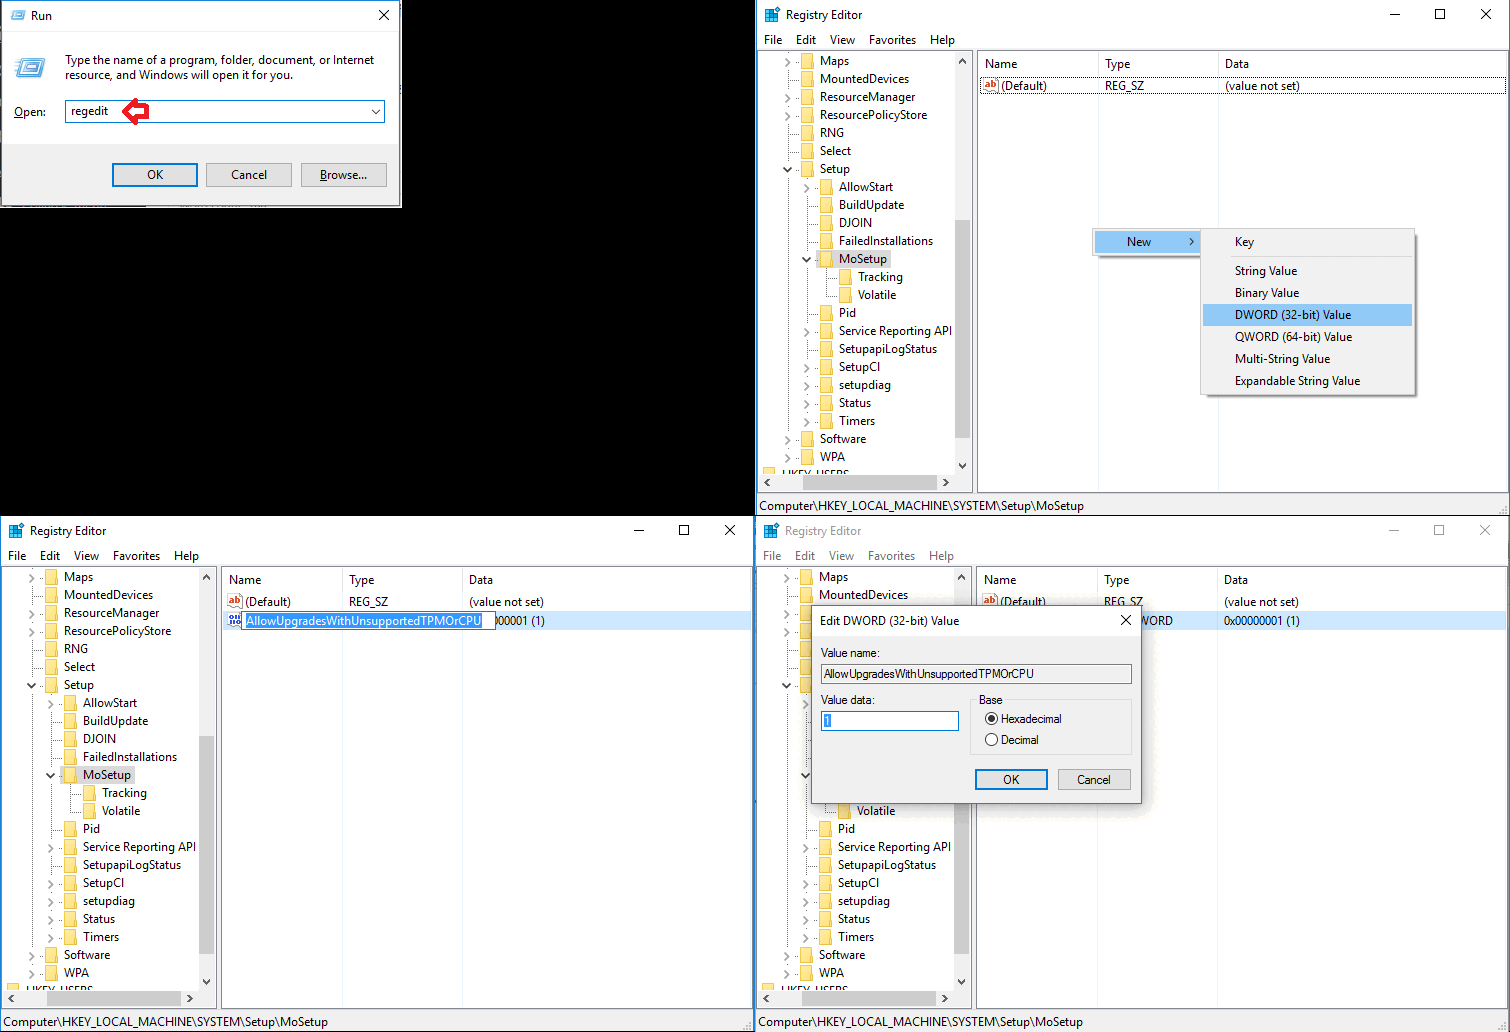
- Go to Run > regedit
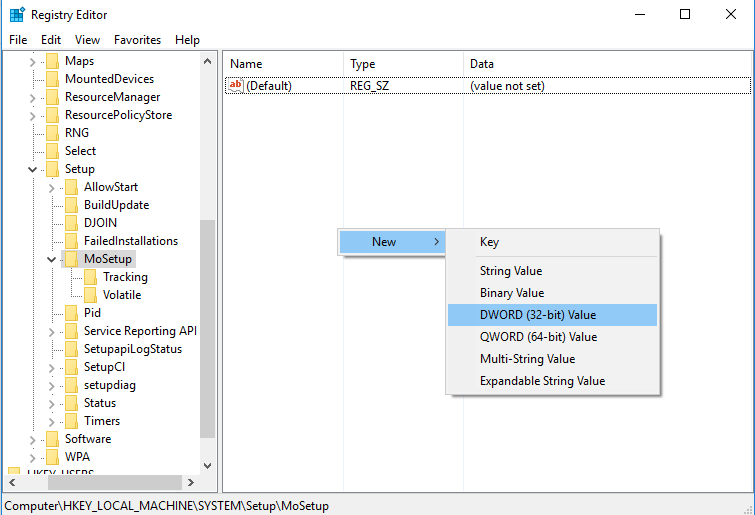
- Go to HKEY_LOCAL_MACHINE > SYSTEM > Setup > MoSetup
- Inside this folder, right-click select DWORD (32-bit) Value from the New option
- Copy and paste i.e., AllowUpgradesWithUnsupportedTPMOrCPU and then double click on it and select its value as 1.
See the above steps in GIF animation below:
Now, go back again and try to run Windows 11 and I am sure that you will not face the following TPM or requirements issue.
Bypass: TPM or Secure Boot check
How to bypass TPM 2.0 error in order to install Windows 11? If you are facing the following red error while installing Windows 11 and your PC health shows you this issue, then don’t worry. Just follow the steps and get rid of TPM 2.0 and secure boot checks.
TPM 2.0 is a requirement for running Windows 11. We recommend that you check if TPM 2.0 is enabled.
After following the steps below, you will be able to see the following green success message.
Good news – this PC meets all the system requirements for Windows, and it’s free. We’ll let you know when it’s ready to install.
Steps to bypass TPM 2.0 and secure boot check:
For unsupported PCs, which don’t support TPM and Secure Boot, kindly make two entries in the Registry of your existing Windows to upgrade to Windows 11 seamlessly.
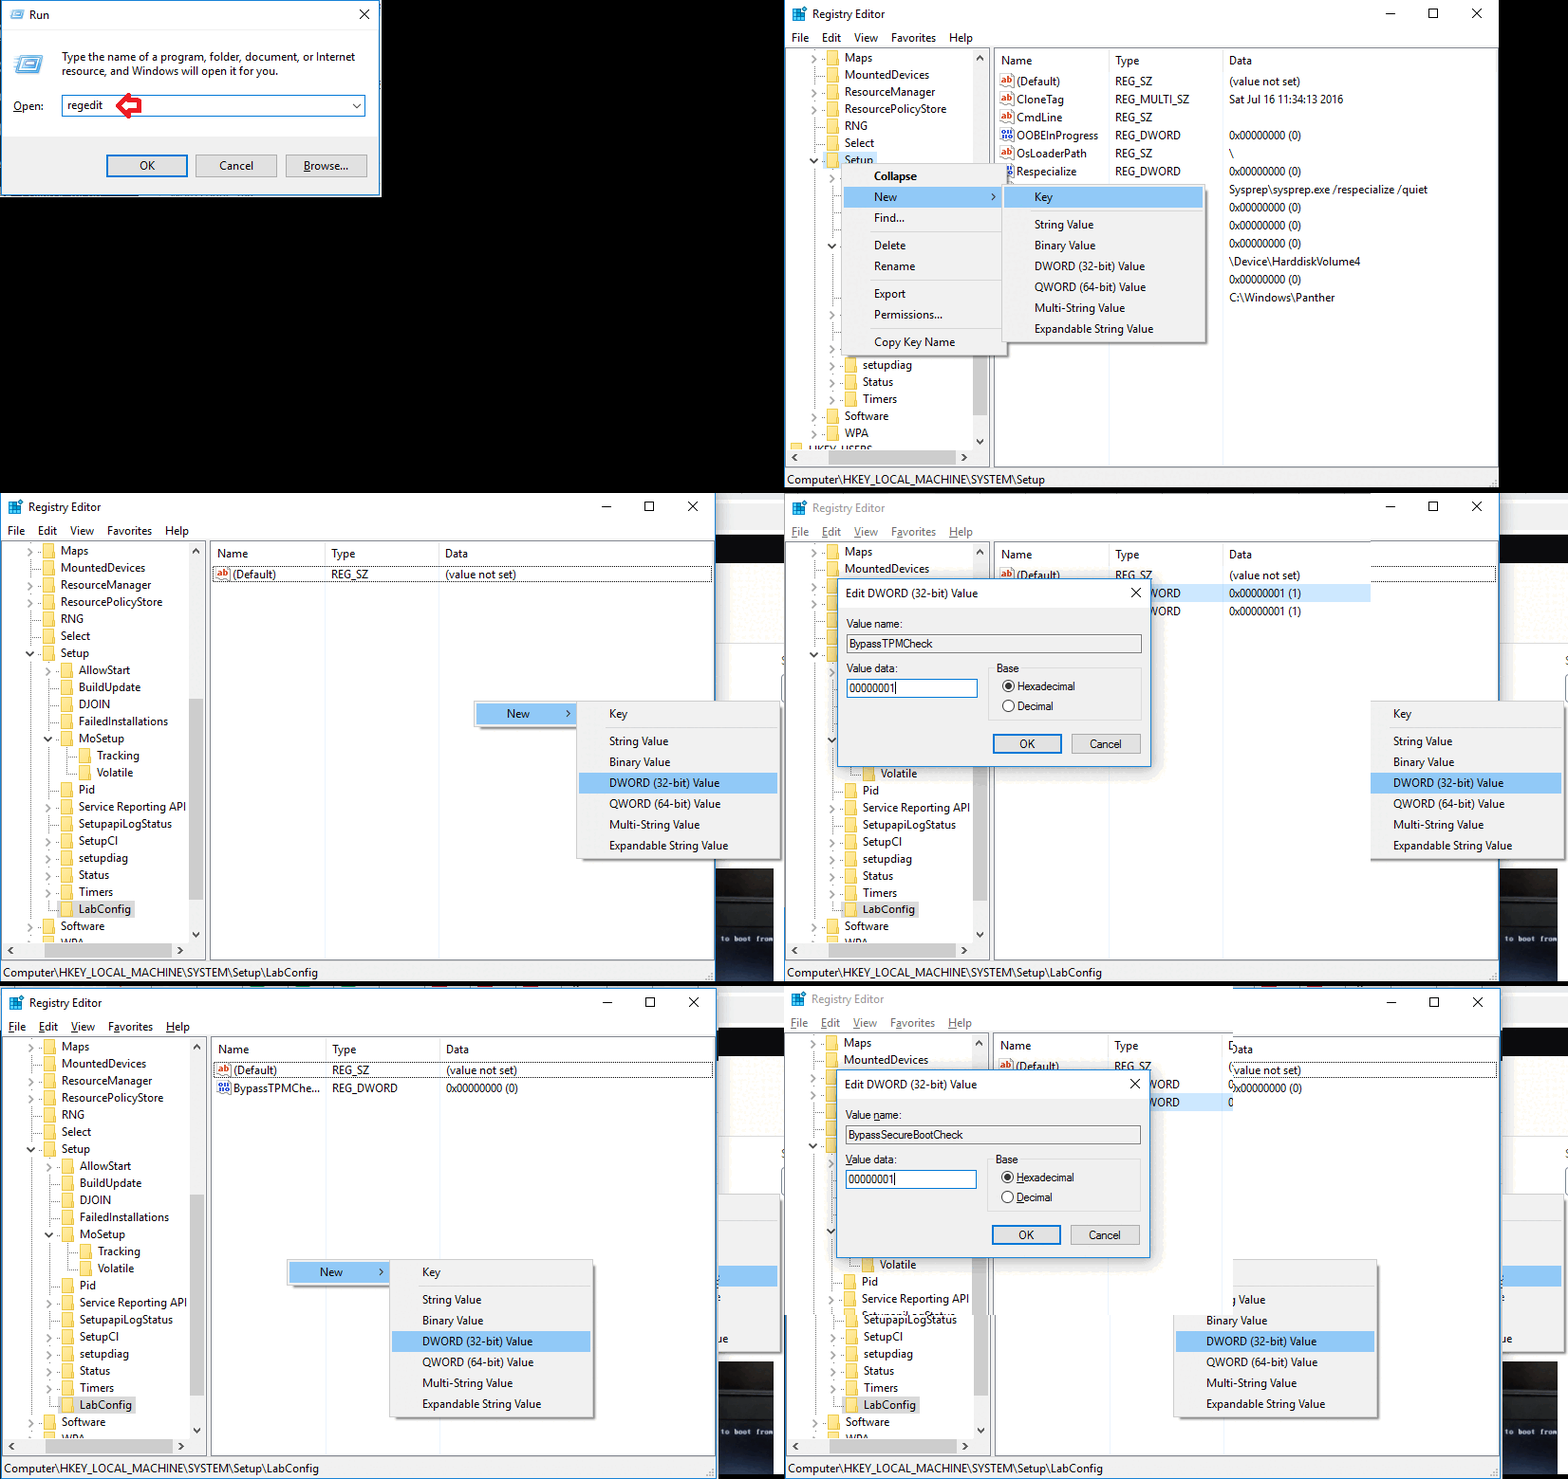
- Go to Run > regedit
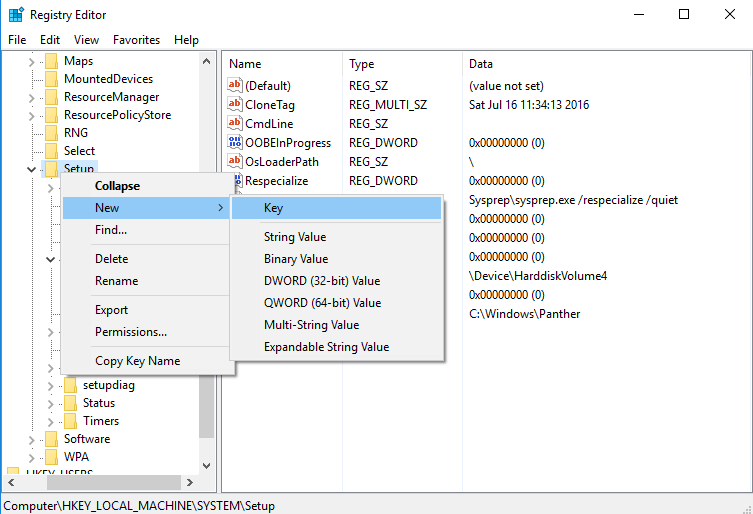
- Go to HKEY_LOCAL_MACHINE > SYSTEM > Setup
- Right-click on Setup and select New > Key to create a new entry under it and name it LabConfig.
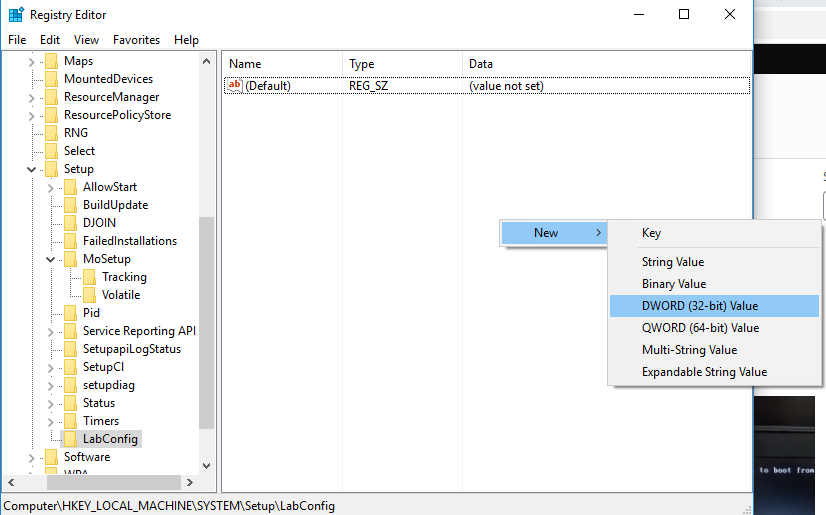
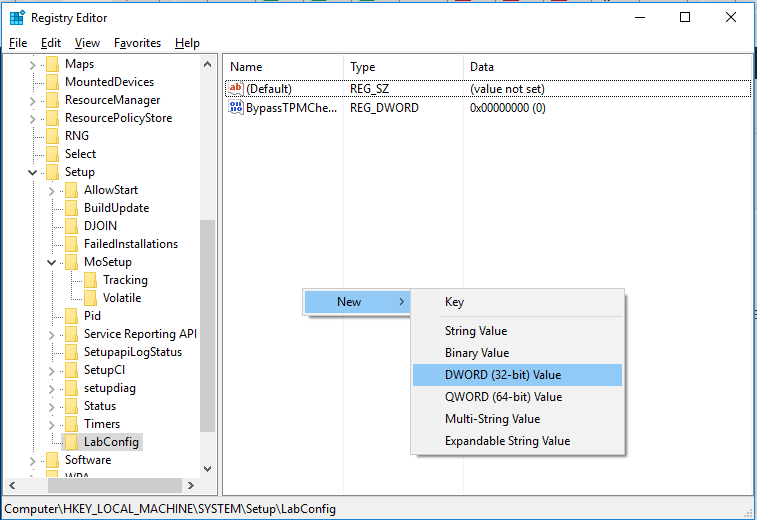
- LabConfig is selected, right-click and select DWORD (32-bit) Value from the New option, as shown:
- Name it, BypassTPMCheck now, double-click on it and set the value to 00000001.
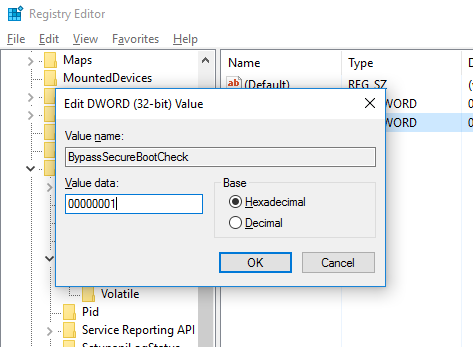
- LabConfig is selected, right-click again and select DWORD (32-bit) Value from the New option, as shown:
- Name it, BypassSecureBootCheck now, double-click on it and set the value to 00000001.
See the above steps in GIF animation below:
Congratulations, Windows 11 installation will no longer check for TPM 2.0 and Secure Boot. It will be installed smoothly.


