Do you have a mailing list? If so, is it growing faster? No!
Then it’s the time to add a Newsletter sign up box to your blog under each post to force your reader to take quick action by subscribing with your blog if they like what you do on your blog!
Subscribers list can increase way more faster if you optimize subscription sign up boxes across your website. The most amazing practice to grab more and more subscribers is:
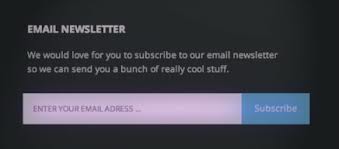
Putting Subscription box under all posts/custom post types, make sure you design your newsletter signup box should be pure and simple (minimal) like this.

Newsletter signup box benefits
Yah, my fellow-bloggers a newsletter sign up box could be really beneficial, am not joking! But telling you what can be AWESOME, this will give a new look to your site. See what it does more!
- It adds a professional look
- Your readers can easily be turned into your loyal readers
- A professional blogger needs a mailing list to grow in the best way, while the subscribers are main EGGS from it! So, concentrate most on increasing them, and providing what they love .
Subscribers are the most important asset for a blogger and do suggest every blogger to get started with a mailing list. Do work more on producing content for your subscribers, and convert them to your customers easily, this is what a blogger can do with a mailing list.
Signup Newsletter Box in Genesis
First of all plan to which mailing list you would like to let your readers subscribe to, I mean you’ll choose feedburner or Mailchimp for your mailing list?. Because, you can also let your readers subscribe to your feeds via email through the same box. OK! Decided? Now, read how to add signup newsletter form below posts for both: 1. For Feedburner Users 2. For MailChimp Users Get started with each of the above mentioned mailing list providers:
For Feedburner Users
1. Feedburner users can use Genesis eNews and Update widget, which gonna be default in your genesis powered site. Copy the following code and paste this into your child theme’s function.php :
/** Register newsletter widget area */
genesis_register_sidebar( array(
    'id'    => 'newsletter',
    'name'    => __( 'After Post Ad', 'custom-theme' ),
    'description'    => __( 'This is the newsletter section.', 'custom-theme' ),
) );
2. Next you will need to locate the following code into your child theme’s function.php which will help in hooking the sign up newsletter box at the end of each post:
/** Add the newsletter widget after the post content */
add_action( 'genesis_after_post_content', 'custom_theme_newsletter' );
function custom_theme_newsletter() {
    if ( ! is_singular( 'post' ) )
    return;
    genesis_widget_area( 'newsletter', array(
        'before' => '<div id="newsletter widget-area">',
    ) );
}
3. You should put the the following CSS code into your child theme’s stylesheet (style.css), you must have to download the images used in sign up newsletter box, and upload them into your child’s theme images directory wp-content/themes/your child theme/images:
/* eNews and Update Widget
------------------------------------------------------------ */

.enews-widget {
    background-color: #e7e7e7;
    border: 10px solid #ddd;
    margin: 0 50px;
}

.enews-widget .widget-wrap {
    border: 1px solid #fff;
}

.enews {
    background: url(images/enews-ribbon.png) no-repeat top left;
    margin: -17px -18px;
    overflow: hidden;
    padding: 45px 50px 40px;
    text-align: center;
    text-shadow: 1px 1px #fff;
}

.enews #subbox {
    -moz-box-shadow: 0 0 3px #bbb;
    -webkit-box-shadow: 0 0 3px #bbb;
    background: #fff url(images/enews-subbox.png) no-repeat center left;
    box-shadow: 0 0 3px #bbb;
    color: #999;
    margin: 10px -7px 10px 0;
    padding: 13px 0 13px 37px;
    width: 250px;
}

.enews #subbutton {
    background-color: #666;
    color: #fff;
    padding: 13px 12px;
}

.enews #subbutton:hover {
    background-color: #555;
}
Note: If you find duplicate of “eNews and Update Widget” in your style.css, just replace the CSS codes with above one. Keep in mind don’t forget to replace the names of images from CSS code i.e. enews-ribbon.png , enews-ribbon-green.png, enews-ribbon-red.png, etc.
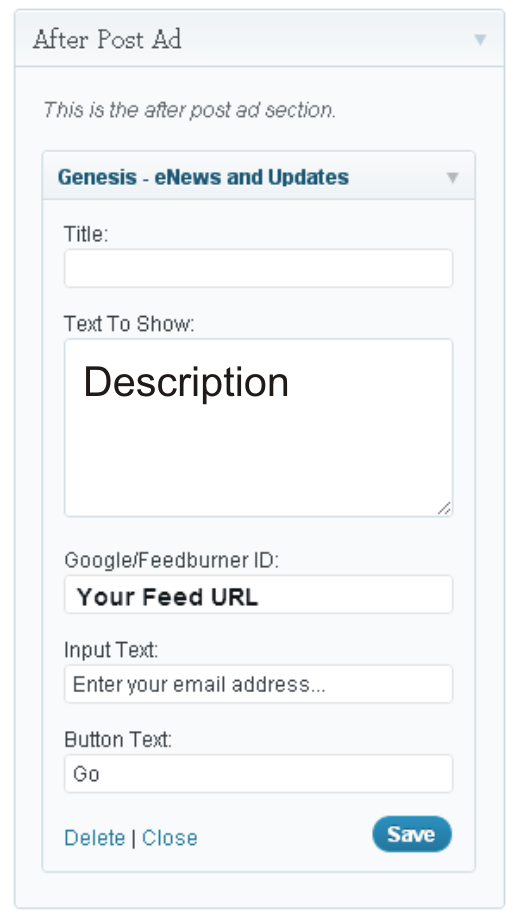
4. Lastly, from Appearance > Widgets drag the widget name ‘eNews and Update widget’ into After Post Ad section which gonna be showing after every post:

5. After having done all the things, hit the save button and check out the final result.
For MailChimp Users
It’s nearly very easy and quite simple, to get started with MailChimp just concentrate on the following steps:
1. Register a widget area in text and place this text widget After Post Ad section, and copy and paste the following code in the text widget:
<div id="newsletter">
    <div class="white-border">
        <div class="newsletter-wrap">
            <h4>Sign up for my Newsletter</h4>
            <p>Receive WordPress tips and learn how to customize the Genesis Framework with detailed tutorials.</p>
            <form action="https://briangardner.us4.list-manage1.com/subscribe/post?u=a9043d2339738bc7912a79148&id=6217d80e7e" method="post" id="mc-embedded-subscribe-form" name="mc-embedded-subscribe-form" class="validate" target="_blank">
            <input type="email" value="" name="EMAIL" class="email" id="mce-EMAIL" placeholder="Enter your email address ..." required>
            <input type="submit" value="Sign Up" name="subscribe" id="mc-embedded-subscribe" class="button">
            </form>
        </div>
    </div>
</div>
Don’t forget to replace MailChimp URL. Hit the save button.
2. Copy the following CSS code and paste this code into child theme’s style.css, I’m repeating again download the images which are used in sign up newsletter box and upload them into your wp-content/themes/your child theme/images:
/* Newsletter
------------------------------------------------------------ */

#newsletter {
    background-color: #f5f5f5;
    border: 10px solid #eee;
    margin: 10px 40px 0;
}

#newsletter .white-border {
    border: 1px solid #fff;
}

.newsletter-wrap {
    background: url(images/enews-ribbon.png) no-repeat top left;
    margin: -17px -18px;
    overflow: hidden;
    padding: 45px 30px 40px;
    text-align: center;
    text-shadow: 1px 1px #fff;
}

.newsletter-wrap p {
    margin: 0 50px 20px;
    text-align: center;
}

.newsletter-wrap input[type="email"] {
    -moz-box-shadow: 0 0 5px #ccc inset;
    -webkit-box-shadow: 0 0 5px #ccc inset;
    background: #fff url(images/enews-subbox.png) no-repeat center left;
    box-shadow: 0 0 5px #ccc inset;
    font-family: 'Open Sans', sans-serif;
    margin: 0 -7px 10px 0;
    padding: 13px 0 13px 37px;
    width: 55%;
}
3. Hit up the button says ‘Update File‘. Hurray! you have done. All credits goes to Brian Gardner, founder of StudioPress. Partner, Copyblogger Media.
However, if you are not Genesis Framework user, follow this article, How to Add Google Feedburner Subscription Form in WordPress.
