In this article we'll show you how actually you can change your WordPress database prefix wp_ in your blog to enhance your blog security. It's nearly very easy to change the database prefix in WordPress. Either we can use plugins or by simply editing things in WordPress installations and MySql database tables. I hope you would gladly prefer to use a WordPress plugin rather than editing files. But, we'll cover both parts in this article. Alright 🙂

Changing WordPress Database Tables Prefix wp_
NOTE: Before we began backup your WordPress blog database. If you don’t know, how to backup WordPress Database. Lemme tell you there is a wide range of plugins which let you backup your WordPress whole database automatically but out of them, the Top 10 Database Backup Plugins <- are, Or use manually method to take WordPress Database Backup.
1. #First Way
Using a WordPress Plugin Change DB Prefix (To what you are ambitious to see)
It's a simple plugin which let's you change the database tables prefix from wp_ to something more unique. This will increase your WordPress blog security. The tables prefix must contain numbers, letters (lowercase as well as uppercase) and underscores.
a. Download, install and activate Change Table Prefix
b. Go to Settings > Change DB Prefix
c. Database tables prefix settings, where you can see the existing prefix and new prefix fields. Change the tables prefix from wp_ to something more unique like aeF786_, so that the hackers can't guess.
d. Click the button Update Settings
Done, and now it's up to you that you delete this plugin or leave it installed. I guess delete it, because it's useless now.
2. Second Way
Changing WordPress Database Prefix wp_ Manually
i) Go to WordPress installations folder.
ii) Edit up wp-config.php.
iii) Press Ctrl + F and try searching $table_prefix, you'll see something like this:
$table_prefix = 'wp_';
iv) Change the 'wp_' to something 'unique_' again saying you can use numbers, letters (lowercase as well as uppercase) and underscores.
v) Login to cPanel and go to Databases > PhpMyAdmin

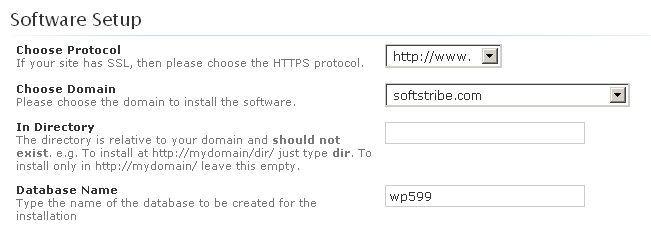
vi) Jump into your blog database from the left side or if you don't know what is database. I guess you that when installing WordPress it seeks about the database name see the following image:

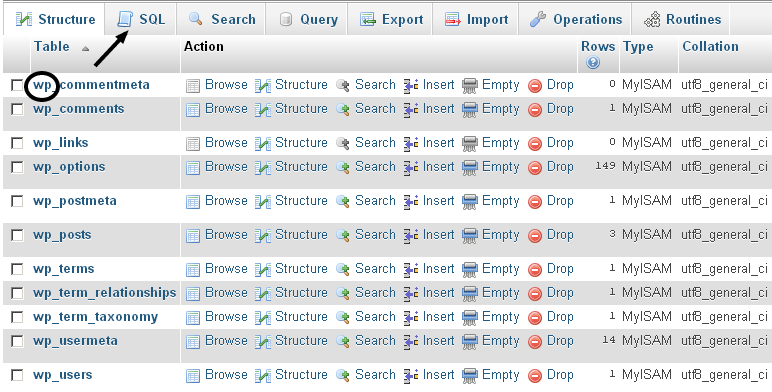
vii) Click on the button SQL:

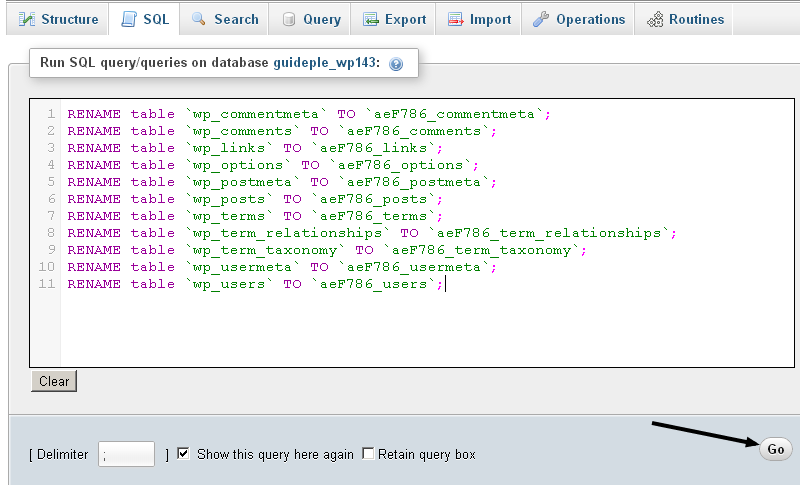
viii) Type the following code in the given text area from SQL tab, not exactly the same just the tables name which are exists in your database.
RENAME table `wp_commentmeta` TO `aeF786_commentmeta`;
RENAME table `wp_comments` TO `aeF786_comments`;
RENAME table `wp_links` TO `aeF786_links`;
RENAME table `wp_options` TO `aeF786_options`;
RENAME table `wp_postmeta` TO `aeF786_postmeta`;
RENAME table `wp_posts` TO `aeF786_posts`;
RENAME table `wp_terms` TO `aeF786_terms`;
RENAME table `wp_term_relationships` TO `aeF786_term_relationships`;
RENAME table `wp_term_taxonomy` TO `aeF786_term_taxonomy`;
RENAME table `wp_usermeta` TO `aeF786_usermeta`;
RENAME table `wp_users` TO `aeF786_users`;
Like this:

You did it!
