How to Create the Best Sticky Headers with Sticky Header Effects for Elementor
Sticky headers are a vital design element for modern websites, ensuring seamless navigation, enhanced branding visibility, and an improved user experience. The Sticky Header Effects for Elementor plugin, available at WordPress.org, is a powerful tool that extends the capabilities of Elementor Free and Pro, allowing users to create dynamic, responsive, and visually appealing sticky headers without writing a single line of code. In this comprehensive guide, we’ll explore how this plugin empowers developers, designers, and website owners to craft professional sticky headers, diving into its features, setup process, customization options, and best practices for optimal results.
Why Sticky Headers Matter
A sticky header remains fixed at the top of the screen as users scroll, keeping essential navigation elements like menus, logos, and call-to-action buttons accessible. This enhances user experience by reducing the need to scroll back to the top, improving navigation efficiency, and maintaining brand visibility. According to web design trends, sticky headers contribute to better user engagement and can positively impact key performance metrics like time on site and conversion rates.
The Sticky Header Effects for Elementor plugin takes this functionality to the next level by offering advanced scroll-based effects, responsive controls, and seamless integration with Elementor’s interface. Whether you’re using Elementor Free or Pro, this plugin provides the tools to create headers that are both functional and aesthetically pleasing.
For a foundational understanding of creating sticky headers in Elementor, check out our blog post on How to Enable a Sticky Header in Elementor or watch our detailed video tutorial on YouTube.
Key Features of Sticky Header Effects for Elementor
The plugin, recently acquired by POSIMYTH Innovations, offers a robust set of features that make it stand out. Here’s a breakdown of its core capabilities:
1. Compatibility with Elementor Free and Pro
Unlike some plugins that require Elementor Pro, Sticky Header Effects works seamlessly with both Elementor Free and Pro. If you’re using the free version with navigation widgets from The Plus Addons for Elementor, you can still leverage most features. For Pro Navigation widgets, Elementor Pro is required. This flexibility makes it accessible to a wide range of users, from beginners to advanced developers.
2. 10+ Scroll-Based Effects
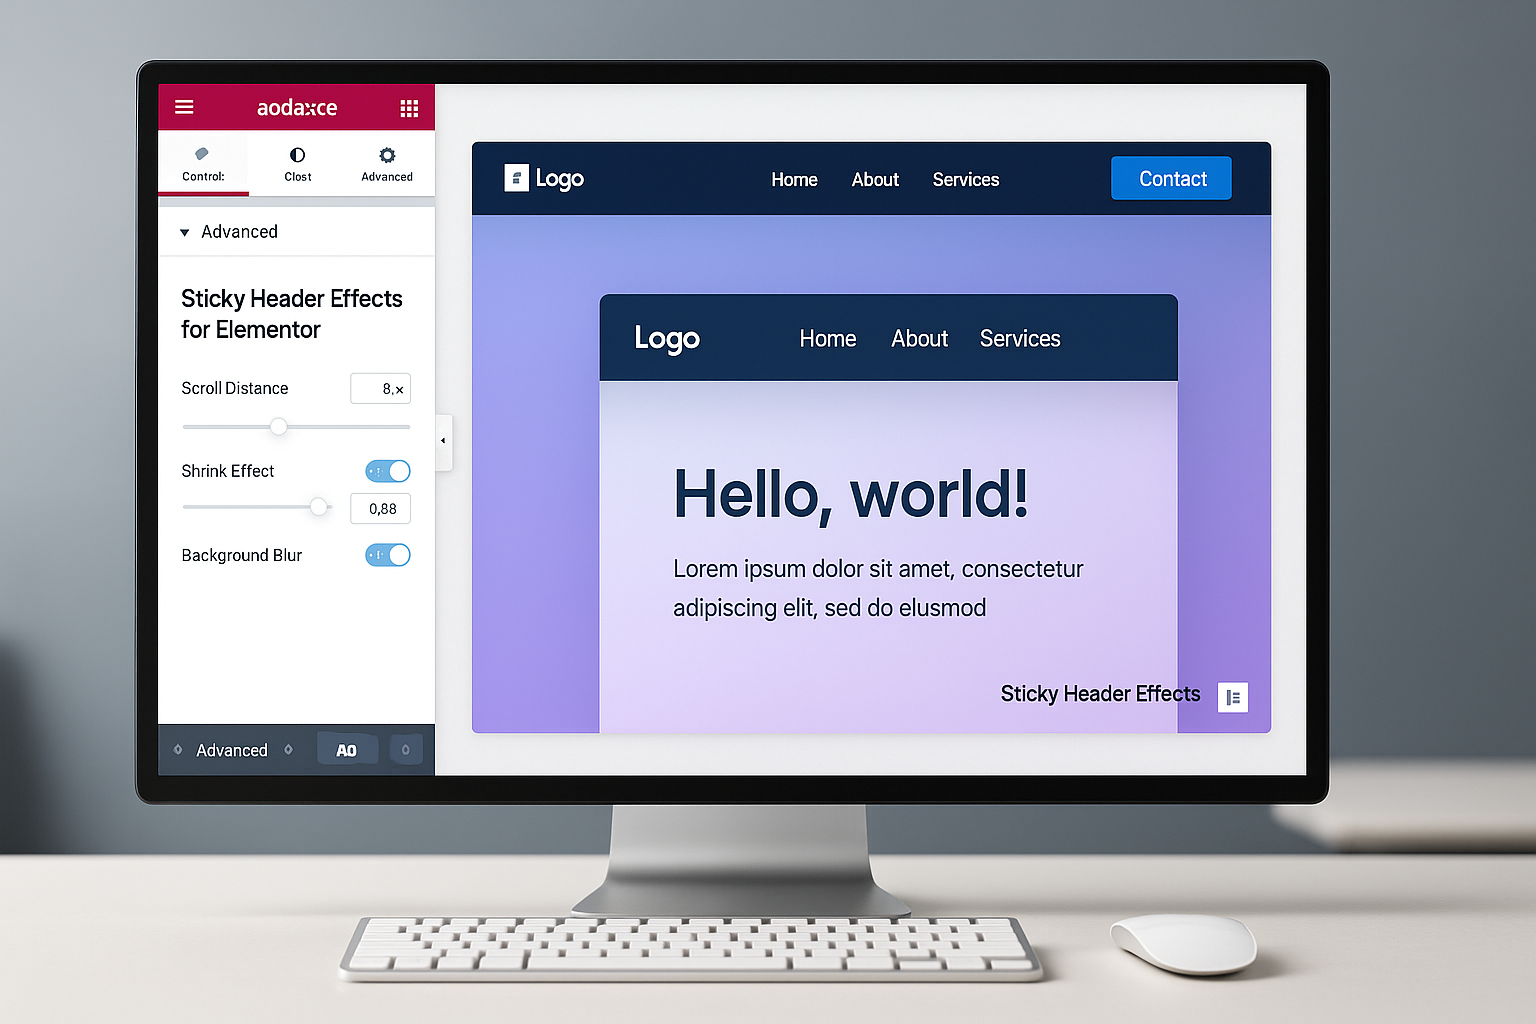
The plugin offers over 10 dynamic effects that activate as users scroll, including:
- Shrink Effect: Reduces the header size for a compact look when scrolling, maximizing content visibility.
- Background Blur: Adds a modern blur effect to semi-transparent headers, enhancing visual appeal.
- Transparent Header: Starts with a transparent header that transitions to a solid or semi-transparent background on scroll.
- Hide on Scroll Down: Hides the header when scrolling down and reveals it when scrolling up, creating a clean user experience.
- Color Swap: Changes background, logo, or text colors dynamically based on scroll position.
- Logo Resize and Color Change: Adjusts logo size or switches its color to match the header’s state.
These effects allow headers to adapt to the page’s design, ensuring a cohesive and professional look.
3. Responsive and Cross-Browser Compatibility
The plugin is fully responsive, ensuring headers look great on desktops, tablets, and mobile devices. It’s also cross-browser compatible, working flawlessly across Chrome, Firefox, Safari, and more, guaranteeing a consistent experience for all users.
4. 50+ Ready-to-Use Templates
With over 50 pre-designed header templates, you can quickly set up a professional header without starting from scratch. These templates are customizable and cater to various industries, from blogs to e-commerce sites.
5. Fine-Tuned Styling Controls
The plugin provides granular control over styling, allowing you to customize:
These controls ensure your header aligns with your site’s design and branding.
6. Performance Optimization
The plugin is lightweight and optimized for speed, ensuring minimal impact on page load times. It’s designed to achieve high Google PageSpeed scores, making it ideal for performance-conscious websites. You can also enable or disable specific features to further optimize performance.
7. Seamless Integration with Elementor
Settings are built into Elementor’s Advanced Tab, keeping your workspace uncluttered. This integration makes it intuitive to configure sticky header effects without navigating complex menus.
8. Sync with Above Sections
The plugin allows you to align sticky effects with sections above the header, ensuring smooth transitions and unified motion across the page. This is particularly useful for complex layouts with hero sections or banners.
How to Set Up Sticky Header Effects for Elementor
Creating a sticky header with this plugin is straightforward. Below is a step-by-step guide, building on Elementor’s native sticky header functionality (as detailed in Elementor’s official guide: Sticky Headers).
Step 1: Install and Activate the Plugin
- Log in to your WordPress dashboard.
- Navigate to Plugins > Add New.
- Search for Sticky Header Effects for Elementor.
- Install and activate the plugin from the WordPress repository.
- Ensure Elementor (Free or Pro) is installed and activated.
Step 2: Create or Edit a Header Template
- Go to Templates > Theme Builder in your WordPress dashboard.
- Create a new header template or edit an existing one by clicking Edit with Elementor.
- Add a section or container for your header, including elements like a logo, navigation menu, and call-to-action button.
For a detailed guide on setting up a basic header, refer to our blog post: How to Enable a Sticky Header in Elementor.
Step 3: Enable Sticky Header Settings
- In the Elementor editor, select the header section or container.
- Go to the Advanced Tab in the left panel.
- Locate the Sticky Header Effects section.
- Toggle the Sticky Header option to ON.
- Configure the Motion Effects by setting Sticky to Top and selecting the devices (Desktop, Tablet, Mobile) where the sticky header should appear.
Step 4: Customize Sticky Header Effects
Within the Sticky Header Effects section, you can configure:
Step 5: Optimize for Shrink Effect
To achieve the best shrink effect, follow these tips:
Step 6: Test and Publish
- Preview the header on different devices to ensure responsiveness.
- Test while logged in and out of WordPress to avoid CSS-related gaps at the top.
- Click Publish and set conditions to display the header (e.g., entire site, excluding 404 pages).
- Verify performance using tools like Google PageSpeed Insights.
For a visual walkthrough, watch our video tutorial: How to Create a Sticky Header in Elementor.
Best Practices for Creating Effective Sticky Headers
To maximize the plugin’s potential, consider these best practices:
1. Keep It Simple
Avoid overloading the header with too many elements. Stick to essentials like a logo, navigation menu, and a single call-to-action button to prevent clutter and maintain usability, especially on mobile devices.
2. Optimize for Mobile
While the plugin is responsive, test mobile behavior thoroughly. Some users report issues with mobile integration, such as sticky headers appearing as normal headers or overlapping content. Ensure device-specific settings are configured correctly, and consider disabling sticky effects on mobile if issues persist.
3. Use Minimal Padding and Margins
For the shrink effect to work effectively, minimize padding and margins in the header section, columns, and elements. This prevents the header from being restricted by content size.
4. Leverage Templates
Start with one of the 50+ pre-designed templates to save time. Customize them to match your brand’s colors, fonts, and style for a professional look.
5. Test Across Browsers
Although the plugin is cross-browser compatible, test your header in multiple browsers (Chrome, Firefox, Safari) to ensure consistent behavior.
6. Combine with Other Plugins
The plugin integrates well with The Plus Addons for Elementor, offering additional widgets and templates for enhanced functionality. For example, use the free navigation widget from The Plus Addons with Elementor Free for advanced menu options.
7. Troubleshoot CSS Conflicts
Some users report challenges with adding custom CSS, such as a “sticky-active” class for further customization. If you encounter issues, check for conflicts with your theme’s CSS or Elementor’s Motion Effects. Adding max-width: 100% !important to the header’s CSS can resolve responsiveness issues.
Limitations and Workarounds
While the plugin is highly praised (with 60+ positive reviews on WordPress.org), it has some limitations:
For advanced troubleshooting, visit the plugin’s support forum or join the POSIMYTH Innovations community for free support.
Why Choose Sticky Header Effects for Elementor?
The plugin stands out for its ease of use, extensive customization options, and performance optimization. Users praise its time-saving features and excellent support, with developers like Robert responding within 48 hours to resolve issues and provide suggestions. Compared to Elementor Pro’s native sticky header functionality, this plugin offers more dynamic effects (e.g., blur, color swap) and works with Elementor Free, making it a cost-effective choice for budget-conscious users.
For those seeking alternatives, plugins like myStickymenu or JetSticky offer similar functionality but may lack the same level of Elementor integration or template variety. For a deeper dive into Elementor’s built-in sticky header options, refer to Elementor’s official guide: Sticky Headers.
Conclusion
The Sticky Header Effects for Elementor plugin is a game-changer for creating professional, user-friendly, and visually stunning sticky headers. Its compatibility with Elementor Free and Pro, extensive scroll-based effects, and responsive design make it a must-have for developers, designers, and bloggers. By following the setup steps and best practices outlined in this guide, you can craft headers that enhance navigation, boost engagement, and align with your brand’s aesthetic.
For more resources, explore our blog post on How to Enable a Sticky Header in Elementor or watch our YouTube tutorial for a hands-on demonstration. Ready to elevate your website’s header? Install the Sticky Header Effects for Elementor plugin today and start building!