Let me guess, you have been using Windows 10 on your laptop and still not able to figure out how to fix this rare error that comes up always on your WiFi/wireless network i.e., Can’t Connect to this Network. This is really a common and most annoying error that comes up on Windows 10 OS.
If you have never encountered this error on your Windows 10 running PC with your wifi enabled then you might wanna skip it. But, those who landed on this page by searching can't connect to this network Windows 10 etc must read the rest of the article.
FYI: This error appears on your Windows 10 PC with WiFi connection enabled (Maybe on other Windows versions too). Don't worry, your WiFi password is correct (yet your router is not being hacked or something). There is nothing to be afraid of. I wrote this article especially to help you fix: can't connect to this network error on Windows 10.
Can’t Connect to this Network WiFi/Wireless Error Fixed (Windows 10)
Step 1: Fixing can't connect to this network in Windows 10:
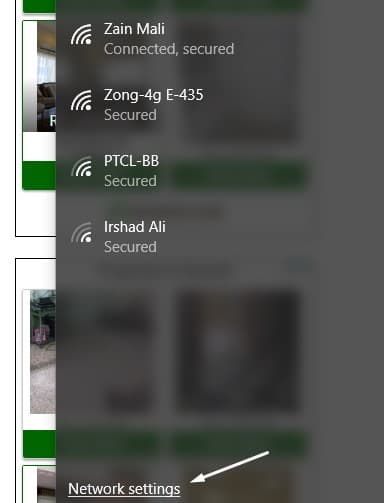
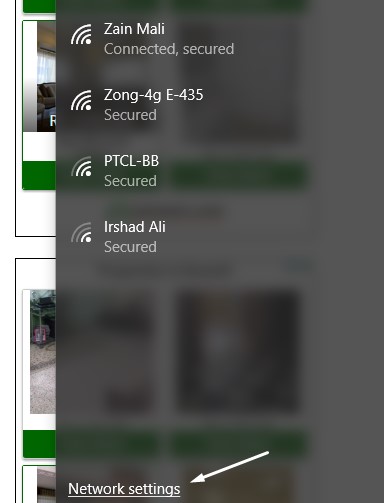
Taskbar → Click on WiFi icon → Go to Network Settings
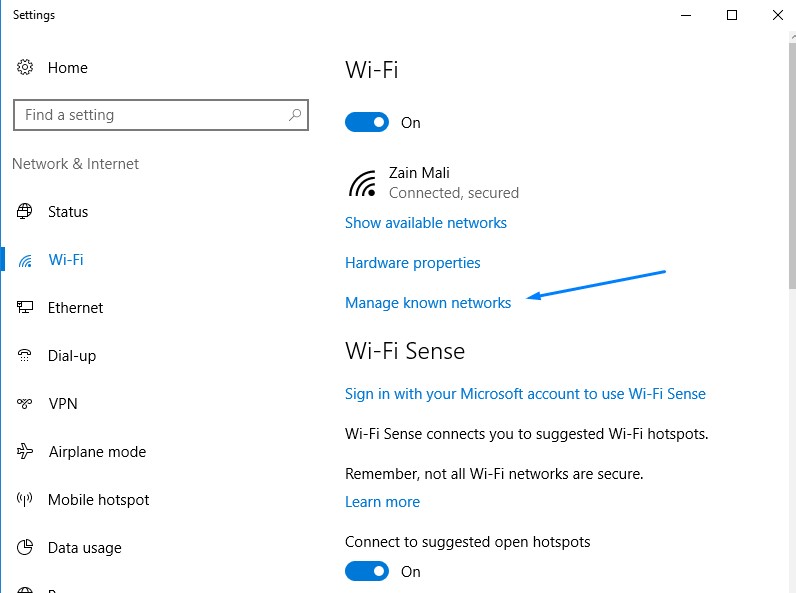
Step 2: Go to Manage Known Networks
Step 3: Just click you own WiFi network that you are not able to connect with then click Forget button
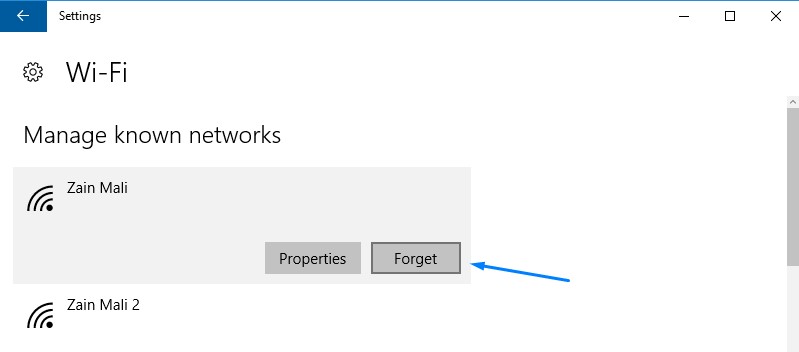
What it will do, clean up your Wireless Connection memory (cache) that caused problem
Step 4: you are all done. Just click WiFi icon from taskbar and click your WiFi connection and add your WiFi password to connect it immediately.
