IPRoyal Review 2024 | Premium Quality Proxies, Unbeatable Prices
It can be difficult to navigate the wide range of proxy providers, but in the competitive market of today, IPRoyal…
It can be difficult to navigate the wide range of proxy providers, but in the competitive market of today, IPRoyal…

DMCA ignored hosting is a service offered by web hosts like is*hosting which lawfully disregards DMCA (Digital Millennium Copyright Act)…

The proximity sensor on your phone is mostly to blame for the screen going dark while on a call. The…
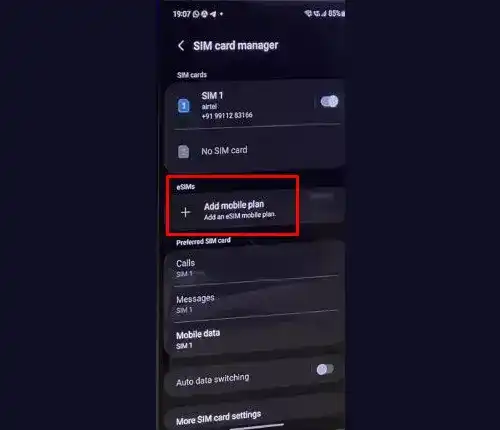
Each passing day brings us closer to the complete replacement of physical SIM cards by eSIMs. Google seems to have…

Today, we are living in the world of smartphone technology, where manufacturers are constantly introducing innovative features to enhance user…

We know exactly how pop-up ads on Android disrupt the browsing experience. Auto-playing video ads are unpleasant and embarrass you…
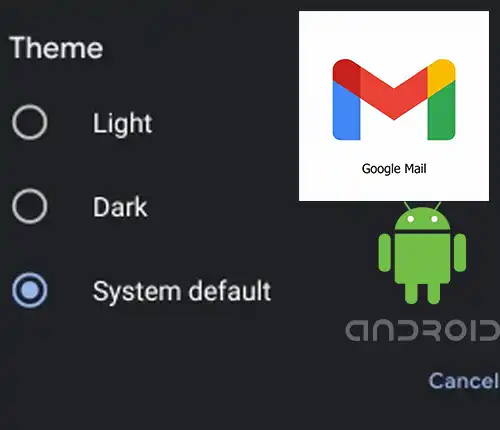
Gmail is one the most used mailing system throughout the world, even though the feature to enable Gmail dark mode…

ChatGPT, Google Bard and Microsoft Copilot represent a recent wave of generative AI models. These models can interpret text prompts…