Here comes an Ultimate Guide to W3 Total Cache WordPress Plugin. Yet a top plugin which let's you make your site load faster in just a few minutes. This plugin provides all in one user experience to make your site a lot faster. Today, we are going to show you the basic settings of W3 Total Cache. How to use it, discussing on the most common factors of this plugin and a lot more.
Read: Get 95+ Score on Google Page Speed Insights (WordPress Only)

So before we start just install and activate W3 Total Cache for better understanding. If you've just installed this plugin, from now you can see that your blog has a new tab called Performance below settings tab. Alright!
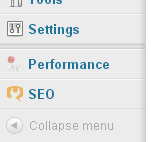
W3 Total Cache Settings
Now, on clicking the performance tab you will be able to access the General Settings Page of this plugin. Where you can see these of the following things:
Basic Assumptions
- General
- Page Cache
- Minify
- Database Cache
- Object Cache
- Browser Cache
- CDN
[sociallocker]
Download PDF
[/sociallocker]
1. General
Remember before you make any change first enable the Toggle all caching types to prevent the mixing settings.

2. Page Cache
Before we began to enable Page Cache through general settings page, we must take a look in-depth to the page caching options by going to Performance > Page Cache.
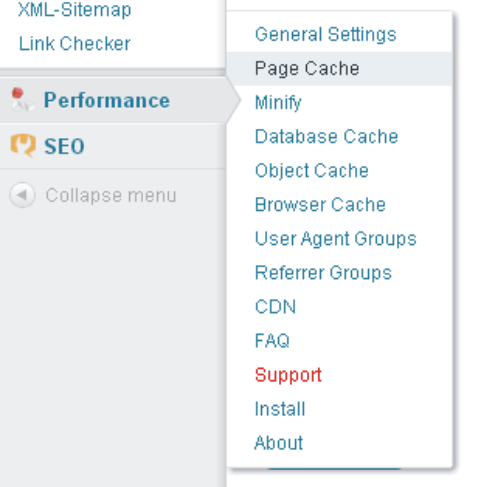
Now, here in Page Cache Settings, the following four (4) options needed to be correct:
- General
- Advanced
- Cache Preload
- Purge Policy
General
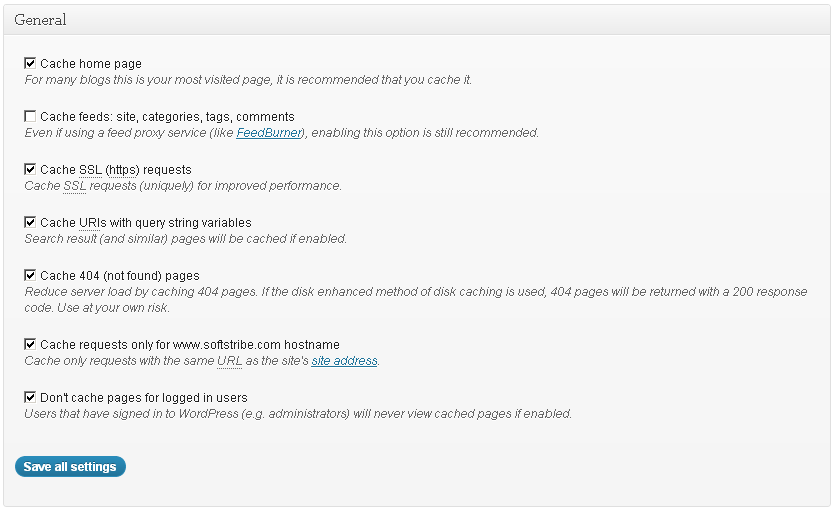
Actually the Page Cache indicates that whether a page should be cached or not. The only mean is that whenever we install anything like plugins, themes, etc, W3 Total Cache automatically seeks to make empty all the cache. In this way these of the following things will be cached out. We can see the check boxes on each of the following:
- Cache home page (Checked)
- Cache feeds: site, categories, tags, comments (Unchecked)
- Cache SSL (https) requests (Checked)
- Cache URIs with query string variables (Checked)
- Cache 404 (not found) pages (Checked)
- Cache requests only for www.yourdomain.com hostname (Checked)
- Don't cache pages for logged in users (Checked)
Advanced
Here's nothing that we change, so I guess don't touch this section. Leave this section on its own.
Cache Preload
Alright!
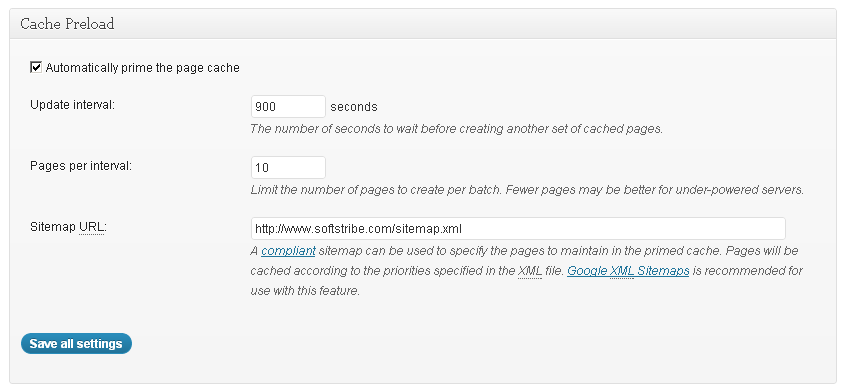
- Automatically prime the page cache (Checked)
- Update interval (900 seconds)
- Pages per interval (less is more 7 to 10 would be better not more than 10)
- Sitemap URL (https://www.yourwebsite.com/sitemap.xml)
Purge Policy
There is no need to touch this section. These of the following things should be checked.
- homepage
- post page
- blog feed
- rss2 (default)

Finally, go through the general settings page and Enable the Page Cache safely.

3. Minify
Most of people use wp-minify WordPress plugin to minify such files i.e, CSS, JS files. Although they already have the options to minify these files in their w3 total cache plugin but they don't use it anymore. Because they really don't know how it works. Here we'll take a look on how to set up minification using w3 total cache plugin on your site.

Now, here in Minify Settings Tab, the following five (5) options needed to be correct:
- General
- HTML and XML
- JS
- CSS
- Advanced
General
Well, you just need to check box on following:
- Rewrite URL structure (Must be checked)
- Disable minify for logged in users (Must be checked)
- Minify error notification (For both Admin and Email notification)

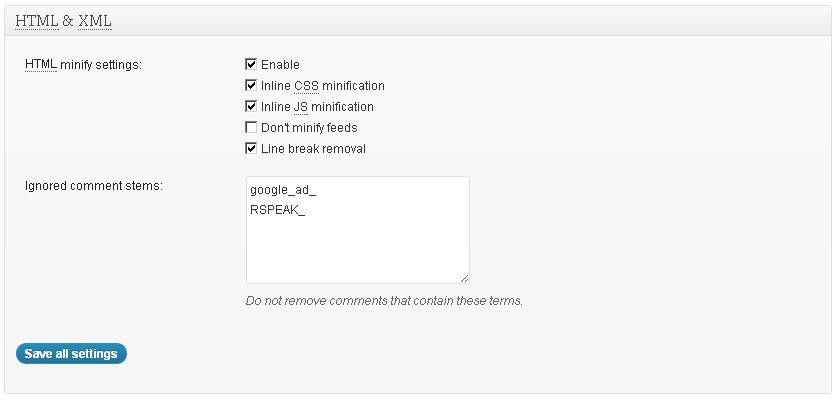
HTML and XML
Enable HTML minify settings:
- Enable (Checked)
- Inline CSS minification (Checked)
- Inline JS minification (Checked)
- Don't minify feeds (Unchecked)
- Line break removal (Checked)
Move on to JS Section
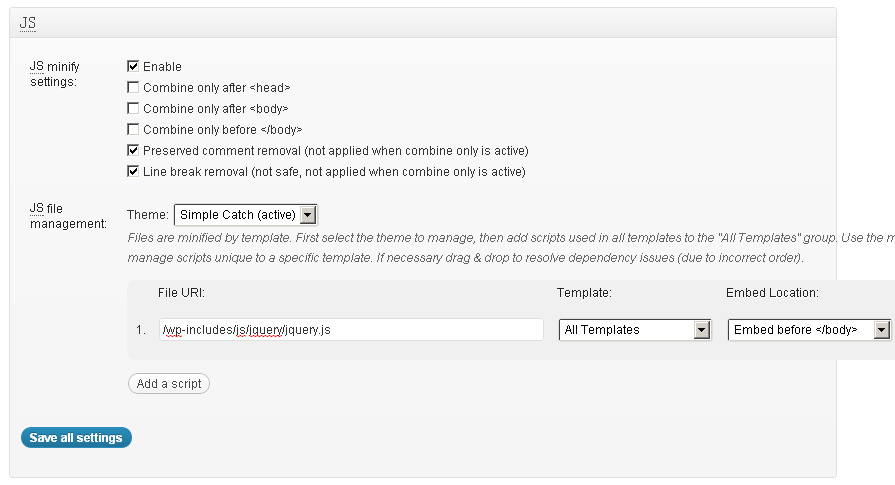
Enable JS minify settings:
- Enable (Checked)
- Combine only after <head> (Unchecked)
- Combine only after <body> (Unchecked)
- Combine only before </body> (Unchecked)
- Preserved comment removal (not applied when combine only is active) (Checked)
- Line break removal (not safe, not applied when combine only is active) (Checked)
Move on to CSS Section
Enable CSS minify Settings:
- Enable (Checked)
- Combine only (Unchecked)
- Preserved comment removal (not applied when combine only is active) (Checked)
- Line break removal (not applied when combine only is active) (Checked)

Advanced
Now, we just have to specify the time period in which the external JS as well as CSS files should be cached out, (21600 seconds for both) would be better to choose. Because the less you select the time the more benefit will your blog have.
- Update external files every (21600 seconds)
- Garbage collection interval (21600 seconds)
4. Database Cache
We don't need to make any change in the Database Cache just disable it through General Settings Page (Unchecked).

5. Object Cache
We don't need to touch this section Object Cache just disable it through General Settings Page (Unchecked).
6. Browser Cache
Basically, the browser cache helps your blog to load quickly by reducing the Yslow grade and rewriting the rules in your .htaccess file. This provides the information to the browser when the browser should cache such files (CSS, JS, HTML, XML, Media and others files) by specifying the time period for them.
Now, here in Browser Cache Tab, the following five (4) options needed to be correct:
- General
- CSS & JS
- HTML & XML
- Media and other files
General
Specify global browser cache policy by enabling those which are useful and also exclude those which are useless.
- (Checked)
CSS & JS
Now, we have to specify the time to cache for CSS and JS files. 604800 Seconds will be better as this mean 168 hours according to apache configurations.

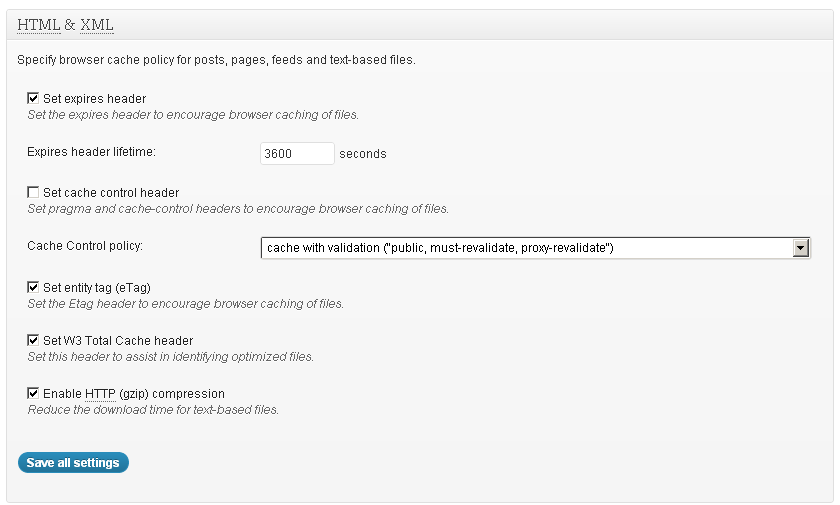
HTML & XML
This section HTML & XML in browser cache refers to specify the cache policies for posts, pages, feeds and text-based files. So, specify the time be carefully or take a look on my own settings below:
Media and other files
- Set expires header (Checked)
- Expires header lifetime (31536000) seconds
- (Checked)
- (Checked)
7. Content Delivery Network (CDN)
Enable the CDN from General Settings Page. Now, login to your Cpanel to make separate sub-domain for your CDN. I guess make a sub-domain with (cdn.yourdomain.com). If you've done creating the sub-domain then create FTP login for it by going to FTP accounts from your hosting.

On this page fill out the login information for the selected root directory.

Alright, all we've done. Now get back to W3 Total Cache > CDN and here you'll see over three (3) options the following are these:
- General
- Configuration
- Advanced
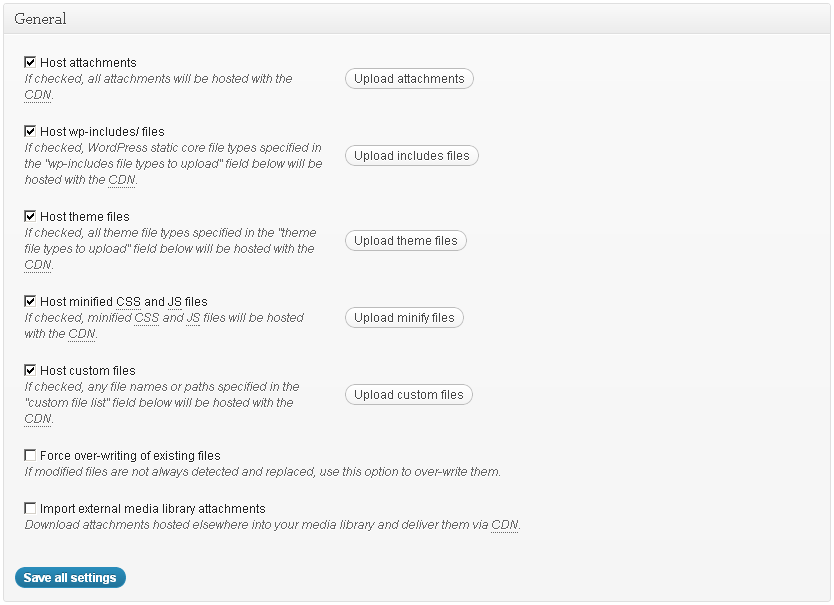
General
- Host attachments (Checked)
- Host wp-includes/ files (Checked)
- Host theme files (Checked)
- Host minified CSS and JS files (Checked)
- Host custom files (Checked)
- Force over-writing of existing files (Unchecked)
- Import external media library attachments (Unchecked)
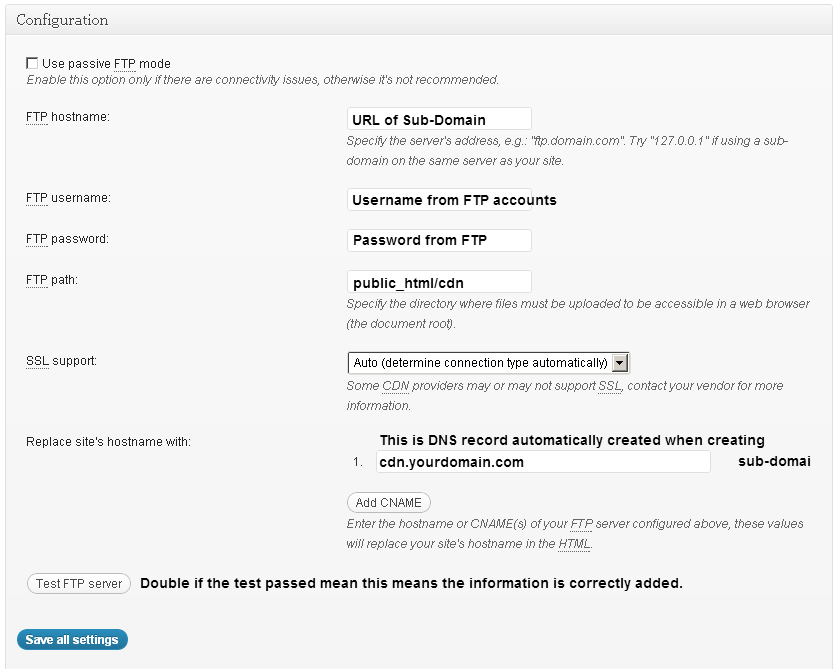
Configuration
- Use passive FTP mode (Unchecked)
- FTP Hostname (means the URL of your sub-domain)
- FTP Username (Insert the username using FTP information)
- FTP Password (Insert the password using FTP information)
- FTP path (public_html/cdn or whatever your sub-domain starts with)
For the overall nature to set up configuration part for your CDN. See the following image:
Advanced
No need to touch this section. Just press the buttons which says save all settings. Lastly to ensure proper operation of your self-hosted CDN just export the media library files to your sub-domain directly by clicking Export Media Library button.

Woops, we have all done. Congratulations with your super fast speed website.
Let's See the Performance Report by GTMETRIX

Lastly, please disable the Toggle all caching types from general settings page.

Alright! Thanks for reading, and good-bye.
