How to Create a Subscribers List in WordPress Like Feedburner, Aweber, and MailChimp
Now, WordPress users can easily create a subscribers list in WordPress (No third-parties involved like Feedburner, Aweber, and MailChimp). However, WordPress users can use their blog’s database to collect subscribers (Name, Email, Age, Interest, Location) and mail them right from their WordPress blog’s dashboard.
Now, you can collect subscribers by simply adding a widget in your blog’s sidebar or directly add a shortcode in your theme wherever you wish to appear the subscription form. If you are reading this article, all we are going to do in this article is to create a subscribers list in WordPress without having to use any third-party services.
Creating a Subscribers List in WordPress
Simple Subscribe is the most secure, easy-to-use and developers friendly WordPress plugin. Simple subscribe gives you the power to simply add subscription form to your WordPress blog via using widget, shortcode or using php in your theme codes. The subscription form can gather more than just e-mail address, you can select additional fields like name, location, age and interests.
All the subscribers can be exported into .xls, .csv, .tsv or .xml format and used anywhere else. In fact, you can even select to export by criteria active, or inactive or simply all.
By the way, an un-subscribe link is also added in each e-mail digest they receive, or you can put un-subscription form on your WordPress blog also. As of now, all use HTML template, and the new post digest uses short excerpt, with post title and post featured image (if there is any).
How Simple Subscribe Plugin Works?
Follow the steps below:
- Install and activate Simple Subscribe plugin in your WordPress plugin
- A new tab (call as Subscribers) will automatically created under Users tab
- Simply, navigate to Subscribers → Settings
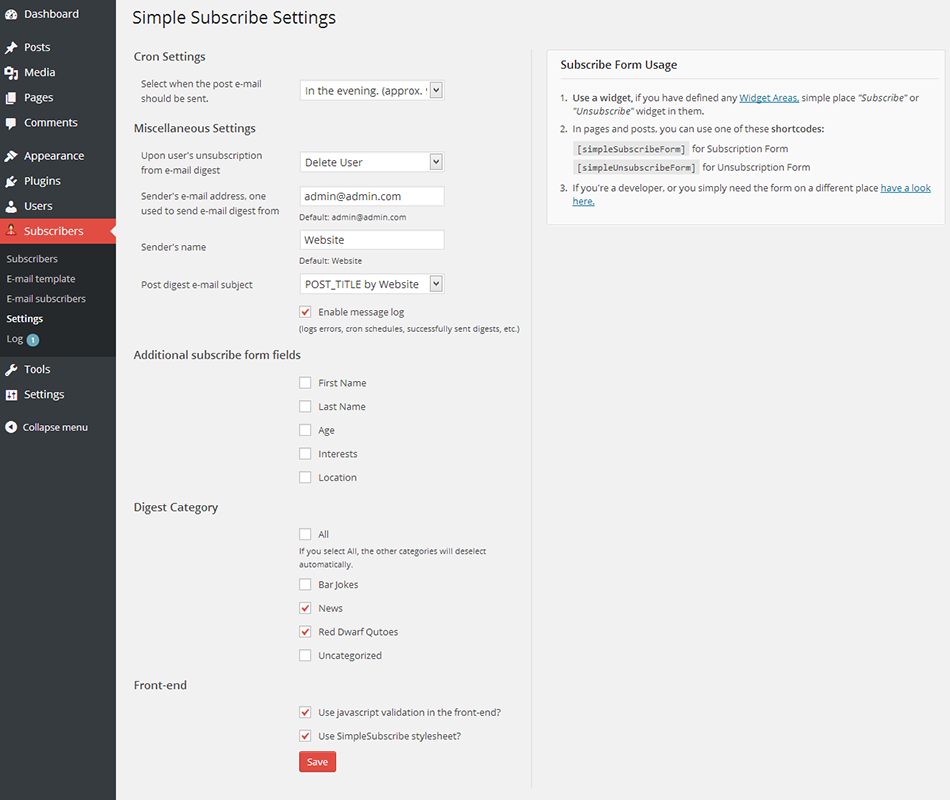
Simply configure the settings about when you want to send the email that contains posts’ to be sent, delete the user from the database upon un-subscription, add the sender’s email, sender’s name, and what should the email contain and all the settings will be done by going to Subscribers → Settings.

Conclusion
So, now as you’ve created a subscribers list in your WordPress blog. Simply, start adding subscription form in your blog to grab more subscribers. To send your blog posts to your subscribers via email, just configure the options in your blog by going to Subscribers → Settings.


Dear Link is network
please check link