How to install Open Source Piwik Web Analytics
Piwik is a downloadable, open source web analytics unlike Google Analytics. It’s the real-time web Analytics program which provides, the detailed reports of your website visitors which includes:
1. Search Engines
2. Keywords
3. The Real Time
4. The language your visitors use to speak
5. Popular pages…
6. and so much more.
Piwik open source web analytics program tends to aim a pen source alternative to Google Analytics.
How to Install Piwik?
In this article we shall take a look on how we can install Piwik. Things that we’ll need. Let’s go.
Things to Consider before Downloading Piwik
To get started with Piwik we must fulfill the following requirements:
- A Web hosting
- Access to your web server (via FTP)
- FTP cliet area
- PHP version 5.1.3 or greater
- MySQL version 4.1 or greater
Complete Installations Guide on Piwik Web Analytics
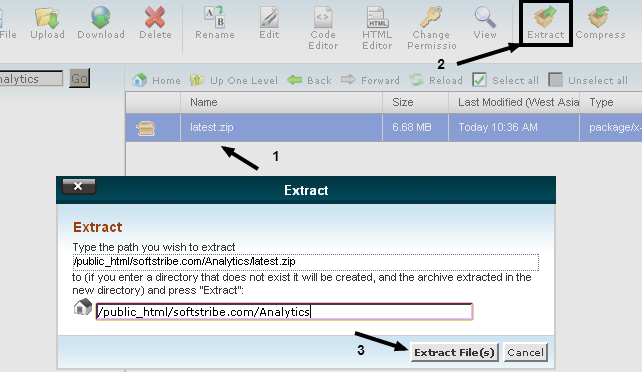
Step #1
At least download the Piwik by clicking the button Download above.
Make a folder with /Analytics/ or make a subdomain (analytics.yoursite.com) and upload that .zip file via cpanel into the /analytics/ folder. Once the .zip file uploaded try extracting it like this, and when extracted you will be promoted to the next step: 😀
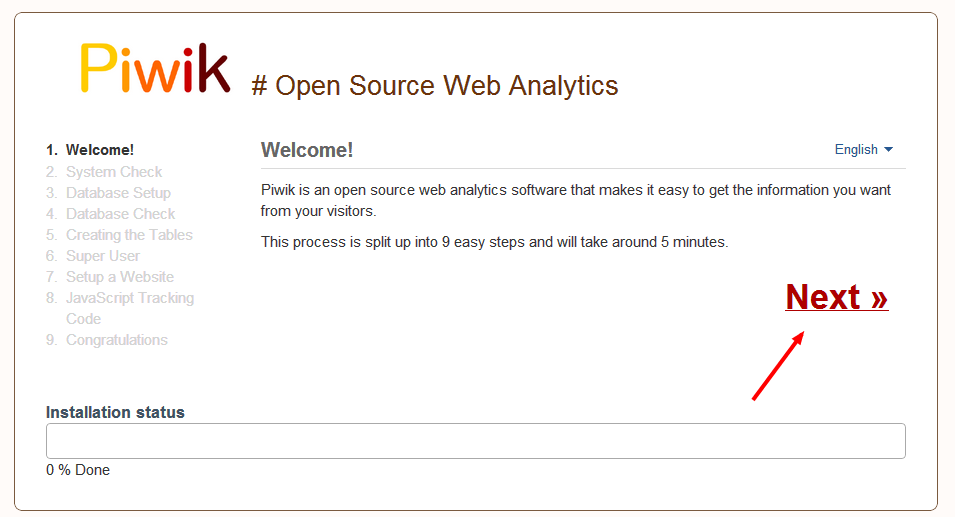
Step #2
This step is simple easy, because all you have to do is the open a web browser and try navigating the URL to which you uploaded Piwik (www.yoursite.com/analytics/piwik). If everything done correctly, you will be able to see the Piwik Installation Welcome Screen. However if something went wrong, Piwik will try to figure that out and help you out with a neat and clean solution.
Welcome Page!
See, we did correct everything and reached to the welcome page.
Piwik System Check
On clicking the button Next, Piwik will automatically check your system, if your system is eligible to use Piwik Web Analytics.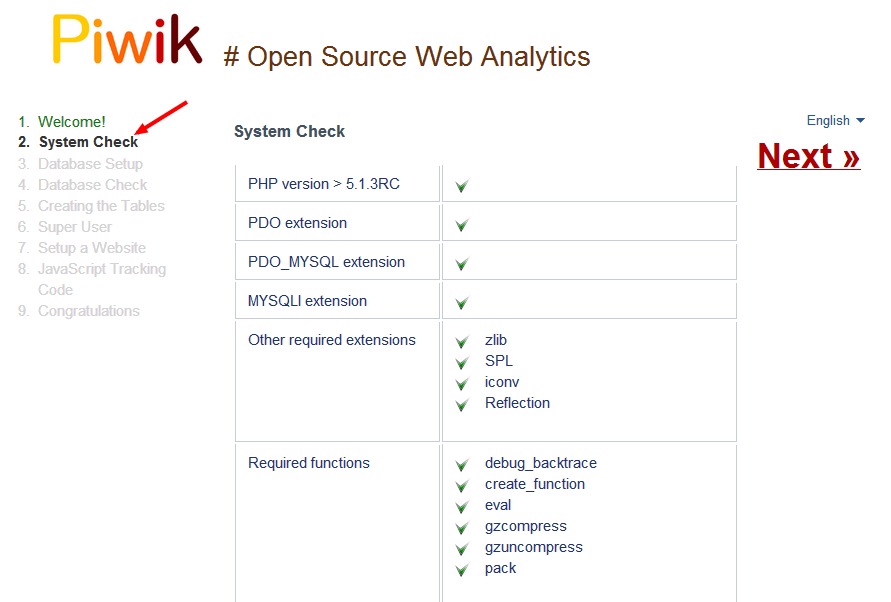
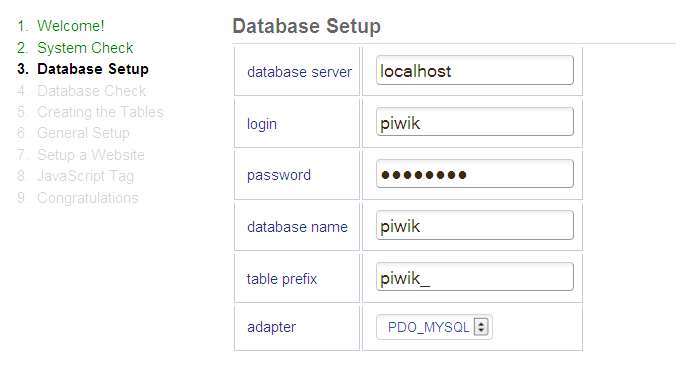
Database Setup
If your system would eligible to use Piwik, the piwik installations will promoted to set up database, where you will add the database information for piwik software.
Create Database Information for Piwik
1. Create a user in database with all privileges
2. Create a Database whatever you call it
3. Add the database user information and database name on the Database Setup page
See the Database Setup example image:
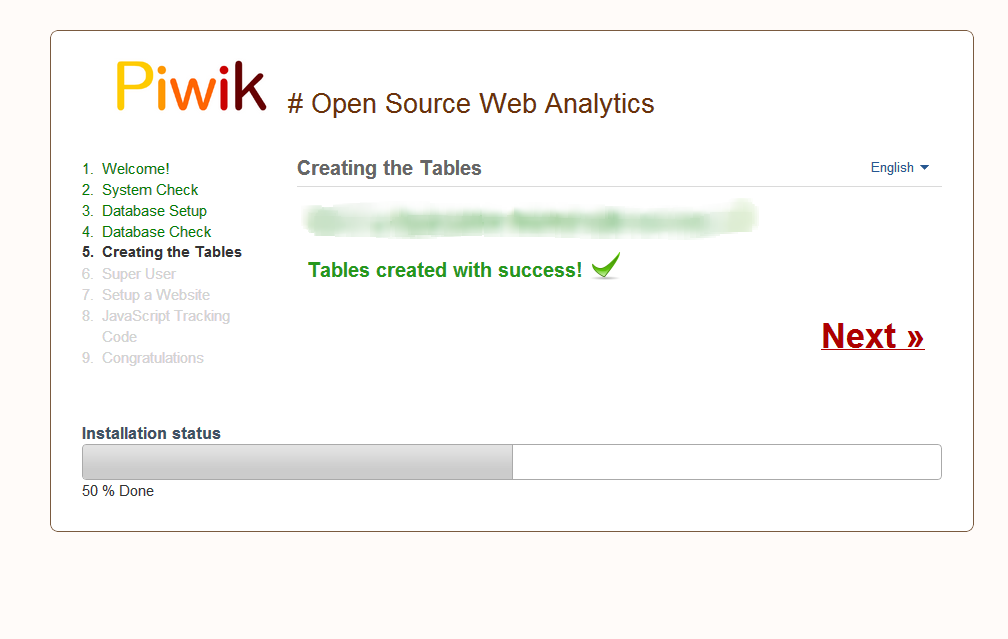
Creating the Tables
Once the information be correct piwik will automatically create the tables into the database.
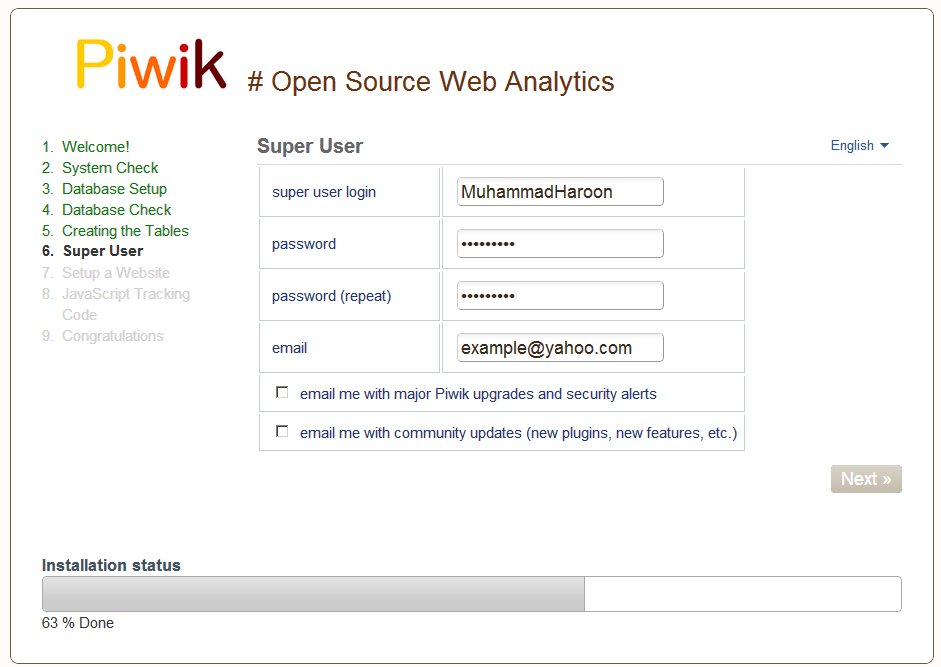
Super User
The user, database, and tables have been created in the past few steps. Now, it’s time to create an administrator login (Super User).
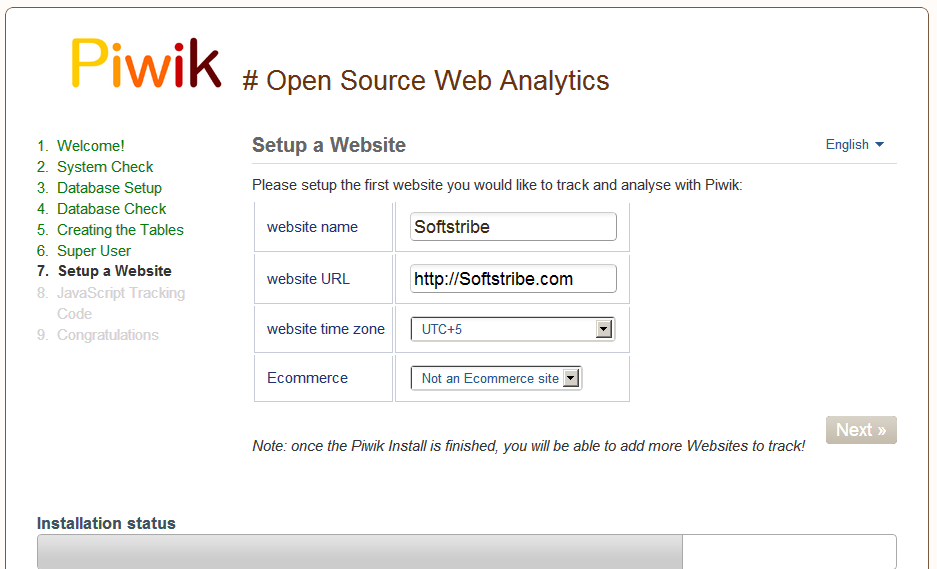
Setup a Website
Once the super user be created next, you’ll need to add your website information.
Adding Tracking code </body>
We add javascript tracking code into website’s webpages to track the visitors, and it’s time to add Piwik javascript tracking code before tag of the webpage. Once the tracking code added into a page the Piwik will be able to track the visitors activities on your site.
![]()
Congratulations
Congratulations! Your Piwik installation has been completed.
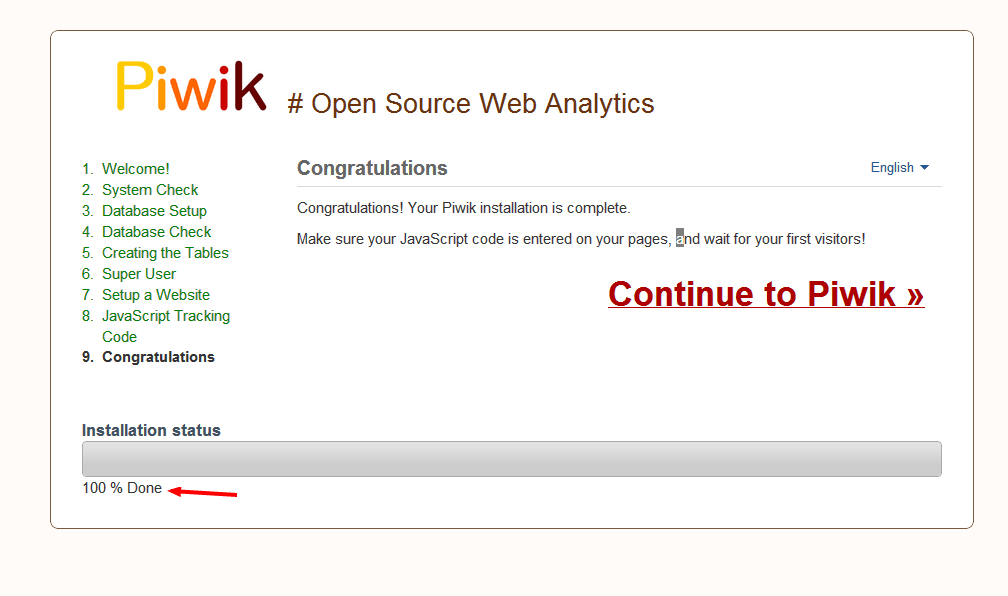
Note: Make sure your JavaScript code is inserted on your pages correctly, and wait for your first visitors!
What Now?
Login to Piwik web analytics by visiting http://yoursite.com/analytics/piwik or wherever you did upload the Piwik setup.

You will now able to see your site stats using an open source Piwik Web Analytics.

Thank you, for reading.